Everything You Need to Know About Safely Relighting a Pilot Light
A pilot light is a small flame that is used to ignite the main burner of a gas appliance, such as a furnace, water heater, or stove. Over time, a pilot light may go out due to a variety of reasons, such as a strong draft, a malfunctioning thermocouple, or simply because the gas supply has been turned off. Relighting a pilot light is a relatively simple task, but it’s important to follow the proper steps to ensure your safety and the proper functioning of your appliance.
Before attempting to relight a pilot light, it’s important to turn off the gas supply to the appliance. This can usually be done by locating the gas shut-off valve, which is typically located near the appliance. Once the gas supply has been shut off, wait a few minutes for any remaining gas to dissipate before proceeding.
Next, locate the pilot light assembly, which is usually located near the main burner. The pilot light assembly typically consists of a small tube that extends from the gas valve and a small flame port where the pilot light is ignited. Once you have located the pilot light assembly, you can prepare to relight the pilot light.
Using a long match or a long-reach lighter, carefully ignite the pilot light by holding the flame near the pilot light port while simultaneously turning the gas supply back on. As the gas flows, the pilot light should ignite and remain lit. If the pilot light fails to ignite or does not stay lit, it may be necessary to clean the pilot light assembly or replace the thermocouple.
After the pilot light has been successfully relit, it’s important to check that the main burner ignites properly. Turn the thermostat or appliance control to the desired setting and listen for the sound of the main burner igniting. If the main burner fails to ignite, it may be necessary to troubleshoot or seek professional assistance to resolve the issue.
Learn How to Safely Relight a Pilot Light
If you have a gas appliance that uses a pilot light, it’s important to know how to safely relight it if it goes out. Here are the proper steps to follow:
Gather the Necessary Supplies
- A long match or a butane lighter
- A flashlight to help you see the pilot light
Turn Off the Gas
- Locate the gas valve for the appliance and turn it to the “off” position.
- Wait for at least 5 minutes to allow any residual gas to dissipate.
Find the Pilot Light
Using your flashlight, locate the pilot light assembly. It is usually located near the burner assembly.
Read the Appliance Manual
Consult the appliance manual or manufacturer’s instructions for specific guidance on relighting the pilot light. Different appliances may have slightly different procedures.
Prepare the Lighter
- Make sure the match or butane lighter is ready to use.
- If using a match, strike it and hold it near the pilot light assembly.
- If using a butane lighter, make sure it is fully charged and ignited before proceeding.
Light the Pilot Light
- Turn the gas valve to the “pilot” position.
- While holding the match or lighter near the pilot light assembly, press down and hold the pilot light button or control knob.
- Continue to hold the button or knob down for about 30 seconds to ensure the pilot light stays lit.
Verify the Pilot Light
After 30 seconds, release the pilot light button or control knob. Check to see if the pilot light remains lit. If it does, you have successfully relit the pilot light.
Turn On the Gas
- Turn the gas valve back to the “on” position.
- Test the appliance to ensure it is working properly.
Remember, if you are unsure or uncomfortable with relighting the pilot light yourself, it is always best to call a professional technician to assist you.
Understanding the Importance of Pilot Light Safety
When it comes to maintaining the safety of your home and appliances, it’s crucial to understand the importance of pilot light safety. Pilot lights are small flames that are continuously burning to ignite the main burner of a gas appliance, such as a furnace, water heater, or stove. While these small flames may seem harmless, it’s essential to take the necessary precautions to ensure they are safely maintained.
1. Prevent gas leaks: Pilot light safety is crucial in preventing gas leaks. A malfunctioning pilot light can result in gas leakage, which can be dangerous and even deadly. It’s important to regularly check for any signs of gas leaks, such as a strong odor of gas or a hissing sound, and immediately contact a professional if you suspect a gas leak.
2. Avoid carbon monoxide poisoning: Carbon monoxide is a colorless and odorless gas that can be produced when a pilot light is not burning correctly. Inhaling carbon monoxide can lead to symptoms such as headaches, dizziness, nausea, and in severe cases, even death. Regularly inspecting and maintaining your pilot light can help prevent carbon monoxide poisoning.
3. Ensure proper appliance functionality: A properly lit pilot light is crucial for the functionality of gas appliances. If the pilot light goes out, the appliance won’t work correctly, leading to potential inconvenience and discomfort. Regularly relighting and maintaining the pilot light ensures that your appliances will function as intended.
4. Follow manufacturer instructions: Each gas appliance may have specific instructions for relighting the pilot light. It’s important to read and follow the manufacturer’s instructions carefully to ensure safe and proper relighting. If you are unsure or uncomfortable performing the task yourself, it’s best to contact a professional for assistance.
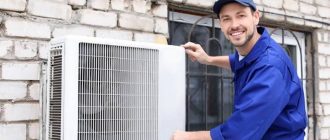
5. Regular maintenance and inspections: Regular maintenance and inspections by a qualified technician are essential for pilot light safety. A professional can ensure that the pilot light and gas appliances are functioning correctly, detect any potential issues, and make any necessary repairs or replacements. Don’t overlook the importance of professional maintenance in keeping your home safe.
Conclusion: Understanding the importance of pilot light safety is crucial for ensuring the safety and functionality of your gas appliances. Taking preventive measures, such as regular inspections, following manufacturer instructions, and contacting a professional when needed, can help prevent gas leaks, carbon monoxide poisoning, and appliance malfunctions. Prioritize pilot light safety and enjoy the peace of mind that comes with a well-maintained gas appliance.
Gathering the Necessary Tools and Equipment
Before attempting to relight a pilot light, it’s important to gather all the necessary tools and equipment. Having everything ready beforehand will help ensure a smooth and safe process. Here are the essential items you will need:
- Flashlight: A flashlight will help provide adequate lighting in case the area around the pilot light is poorly lit.
- Lighter or Matches: You will need a lighter or matches to ignite the pilot light. Make sure they are in good working condition.
- Protective Gloves and Eyewear: It’s recommended to wear protective gloves and eyewear to protect yourself from any potential hazards.
- User Manual: If available, refer to the user manual or instructions provided by the manufacturer for your specific appliance. They may contain important information or guidance.
- Gas Shut-off Valve Wrench: In some cases, you may need a special wrench to access the gas shut-off valve. Check your user manual to determine if this is necessary.
Having these tools and equipment ready will help you approach the process with confidence and ensure your safety. Once you have everything gathered, you can proceed to the next steps of relighting the pilot light.
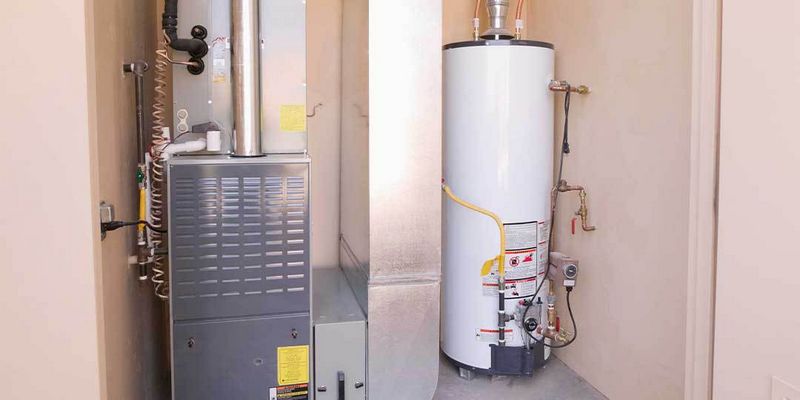
Locating the Pilot Light
Before you can relight the pilot light, you need to first locate it. The pilot light is a small flame that ignites the gas burner and is typically found in gas appliances such as water heaters, furnaces, and stoves. Here are a few common places where you may find the pilot light:
- Water Heater: The pilot light in a water heater is usually located near the bottom of the tank. It may be behind a small access panel or visible through a viewing window.
- Furnace: The pilot light in a furnace is typically located near the burner assembly. You may need to remove a panel or open a small door to access it.
- Stove: The pilot light in a gas stove is often located underneath the cooktop. You may need to lift the cooktop or remove grates to see it.
If you are having trouble locating the pilot light, consult the owner’s manual for your appliance or look for online resources specific to your make and model. It’s important to note that some newer appliances may not have a pilot light as they may use electronic ignition systems instead.
Once you have located the pilot light, make sure you have the necessary tools and safety equipment before proceeding to the next steps.
Taking Precautions Before Relighting
Before you start the process of relighting a pilot light, it’s important to take certain precautions to ensure your safety. Here are some steps to follow:
- Turn off the gas supply: Locate the gas valve and turn it to the “off” position. This will prevent any gas from flowing while you work on relighting the pilot light.
- Allow time for gas to dissipate: After turning off the gas supply, give it some time for any residual gas to dissipate before attempting to relight the pilot light. This will ensure that you’re not working with any potentially dangerous fumes.
- Gather necessary tools: Before you begin, make sure you have all the necessary tools at hand. This may include a long-reach lighter or matches, a flashlight for better visibility, and any other specific tools required for your particular appliance.
- Read the manufacturer’s instructions: Each appliance may have specific instructions for relighting the pilot light. Take the time to read the manufacturer’s instructions and familiarize yourself with the process before you start.
- Wear protective gear: To protect yourself from any potential accidents or mishaps, it’s important to wear appropriate protective gear. This may include gloves, safety goggles, and clothing that covers your arms and legs.
- Ensure proper ventilation: Make sure there is adequate ventilation in the area where you’ll be working. This will help to prevent the accumulation of gas and ensure better air circulation.
By following these precautions, you can safely proceed with the process of relighting a pilot light. Taking the necessary steps beforehand will help to minimize any potential risks and ensure a successful relighting experience.
Shutting Off the Gas Supply
Before attempting to relight a pilot light, it is important to make sure that the gas supply is turned off. This is a crucial step to ensure safety and prevent accidents. To shut off the gas supply, follow these steps:
- Locate the gas shut-off valve. This valve is usually located near the gas meter or the gas line leading to the appliance.
- Turn the valve clockwise to close it. It is important to make sure that the valve is completely closed to prevent any gas from leaking.
- If you are unsure about the location or operation of the gas shut-off valve, consult the user manual or contact a professional.
- Once the gas supply is shut off, allow a few minutes for any residual gas inside the appliance to dissipate.
- Never attempt to relight a pilot light if you smell gas. In such cases, leave the area immediately and contact the gas company or emergency services.
By shutting off the gas supply before relighting a pilot light, you can ensure a safe and controlled environment for the process. Safety should always be the top priority when dealing with gas appliances. If you are uncomfortable or unsure about any step of the process, it is best to seek professional assistance.
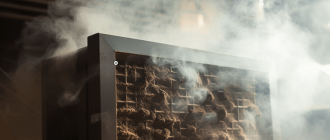
Inspecting for Gas Leaks
Before attempting to relight a pilot light, it is important to inspect the area for any signs of gas leaks. Gas leaks can be extremely dangerous and can lead to fire or explosion hazards if not addressed properly. Here are the steps to inspect for gas leaks:
- Turn off all gas appliances: Start by turning off all gas appliances in the vicinity of the pilot light. This includes stoves, water heaters, and any other appliances that use natural gas.
- Open windows and doors: Open windows and doors to ventilate the area and allow any potential gas leaks to dissipate. This will help minimize the risk of gas accumulation and make it easier to detect any gas odors.
- Use a gas leak detector: If you have a gas leak detector, follow the manufacturer’s instructions to test for any gas leaks in the area. Gas leak detectors can sense small amounts of gas in the air and alert you with a visual or audible alarm.
- Check for the smell of gas: Even if you don’t have a gas leak detector, you can still rely on your sense of smell. Methane gas, which is the primary component of natural gas, has a distinctive odor. If you detect a strong rotten egg smell, it may indicate a gas leak. However, not all natural gas is odorized, so this method may not always be reliable.
- Look for signs of a gas leak: Gas leaks may also be indicated by other signs such as hissing sounds, bubbling in standing water, or dead vegetation near pipelines or gas meters. If you notice any of these signs, it is important to contact your gas supplier or a licensed professional to address the issue immediately.
- Avoid open flames and sparks: During the inspection, avoid using open flames or creating sparks as these can ignite any potential gas leak. This includes avoiding smoking or using lighters or matches.
Remember, if you suspect a gas leak, it is essential to prioritize your safety and the safety of those around you. Do not attempt to relight the pilot light until the gas leak has been addressed by a professional. Always follow the manufacturer’s instructions and consult a licensed professional if you have any doubts or concerns about your gas appliances.
Preparing the Area for Relighting
Before attempting to relight a pilot light, it is important to ensure that the area around the appliance is safe and ready for the relighting process. This will help prevent accidents and ensure that the pilot light is relit properly. Follow these steps to prepare the area for relighting the pilot light:
- Turn off the gas supply: Before doing anything, locate the gas supply valve and make sure it is turned off. This will prevent any leaks or potential gas buildup while working on relighting the pilot light.
- Remove any flammable materials: Take a look around the appliance and remove any flammable materials or objects that may pose a fire hazard. This can include paper, cardboard, or fabrics that are in close proximity to the pilot light.
- Clean the area: Use a damp cloth or a mild cleaner to wipe away any dust, debris, or grease that may have accumulated around the appliance. This will help maintain a clean and safe environment for relighting the pilot light.
- Ensure proper ventilation: Check that the area where the appliance is located has proper ventilation. This will help with the combustion process and prevent the buildup of toxic gases. If needed, open windows or doors to ensure a good airflow before relighting the pilot light.
- Safety equipment: Before starting the relighting process, it is important to have some safety equipment nearby, such as a fire extinguisher and a flashlight. These items can be useful in case of emergency and should be easily accessible during the process.
By following these steps and preparing the area before attempting to relight a pilot light, you can ensure a safer and more efficient process. Remember to always prioritize safety and take necessary precautions when working with gas appliances.
Lighting the Pilot Light with Matchstick
Relighting a pilot light can be a simple and safe process if you follow the proper steps. In some cases, you may need to use a matchstick to light the pilot light. Here is a step-by-step guide on how to safely light the pilot light with a matchstick:
- Turn off the gas supply: Before attempting to relight the pilot light, ensure that the gas supply to the appliance is turned off. This can usually be done by turning the gas valve to the “off” position.
- Locate the pilot light: The pilot light is typically located near the burner assembly of the appliance. It can usually be identified by a small metal tube with a pilot flame at the end.
- Prepare the matchstick: Take a matchstick and make sure it is dry and in good condition. Remove any excess matchstick material if necessary.
- Light the matchstick: Ignite the matchstick by striking it against the designated striking surface. Make sure the matchstick is fully lit and the flame is stable before proceeding.
- Approach the pilot light: Carefully bring the lit matchstick towards the pilot light. Make sure to keep your hand at a safe distance to avoid getting burned.
- Ignite the pilot light: Hold the matchstick near the pilot light’s flame. The gas should ignite and the pilot light should start burning.
- Confirm the flame: After the pilot light has been lit, observe the flame to ensure it is burning steadily. If the flame appears weak or does not stay lit, it may require further troubleshooting or professional assistance.
- Turn on the gas supply: Once the pilot light is successfully ignited, you can turn the gas valve back on. This will allow the appliance to function properly.
Always remember to exercise caution when dealing with gas appliances. If you are unsure or uncomfortable with relighting the pilot light yourself, it is recommended to seek professional help.
Adjusting the Pilot Light Flame
If you have successfully relighted your pilot light but it does not burn blue and steady, you may need to adjust the flame. Here are the steps to follow:
- Before making any adjustments, turn the gas control knob to the “off” position. This will ensure that no gas is flowing while you work on adjusting the flame.
- Locate the pilot light adjustment screw. This is usually located near the pilot light assembly, but the exact position may vary depending on the model of your appliance. Consult the manufacturer’s manual if you’re unsure.
- Use a screwdriver or the appropriate tool to turn the adjustment screw. Turning the screw clockwise will decrease the size of the flame, while turning it counterclockwise will increase the size of the flame. Make small adjustments and observe the flame to achieve the desired result.
- After making an adjustment, wait a few minutes to allow the flame to stabilize. Observe the flame and check if it burns blue and steady. If not, continue to make small adjustments until you achieve the desired flame.
- Once you have adjusted the pilot light flame to your satisfaction, turn the gas control knob to the desired setting. If you’re not sure which setting is appropriate, consult the manufacturer’s manual.
- Finally, check the pilot light regularly to ensure it continues to burn correctly. A properly adjusted flame should burn steady and blue. If you notice any fluctuations or a yellow-orange color, it may indicate a problem that needs further attention.
Remember, if you’re unsure about any of these steps or if you encounter difficulties, it’s always best to consult a professional technician or contact the manufacturer for guidance.
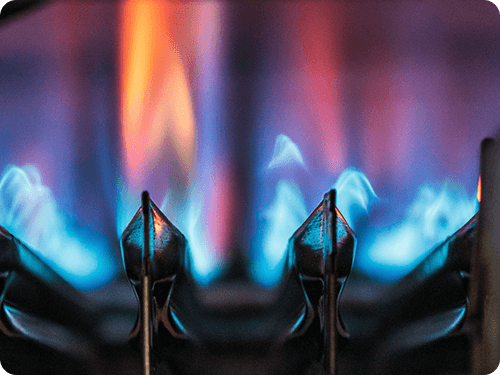
Checking for Proper Flame Color
After safely relighting the pilot light, it is important to check the flame color to ensure it is burning correctly. A proper flame color indicates that the fuel is burning efficiently and that the appliance is operating safely. Here are some guidelines for checking the flame color:
- Blue Flame: A blue flame is the ideal color for a gas appliance. It indicates that the fuel is burning efficiently and completely. The flame should be relatively steady, with minimal flickering. A blue flame with a small yellow tip at the top is also acceptable.
- Yellow Flame: A yellow flame is a sign of incomplete combustion. It may indicate that there is a problem with the gas mixture or an insufficient air supply. A yellow flame can produce soot and carbon monoxide, which are potentially dangerous. If you see a yellow flame, it is best to contact a professional to investigate and resolve the issue.
- Orange Flame: An orange flame is another indication of incomplete combustion. It may indicate that there is a blockage in the burner or a problem with the gas mixture. If you notice an orange flame, it is advisable to have the appliance inspected and repaired by a qualified technician.
It’s important to note that the flame color can vary depending on the type of gas appliance and the specific manufacturer’s recommendations. Always refer to the appliance’s manual or consult with a professional if you have any concerns or doubts regarding the flame color.
Regularly monitoring the flame color is crucial to ensure the safe and efficient operation of gas appliances. If you notice any unusual flame color, such as yellow or orange, it is important to address the issue promptly to prevent potential safety hazards.
Turning on the Gas Supply
Before relighting the pilot light on your appliance, you need to make sure that the gas supply is turned on. This is an important step to ensure that the pilot light and the appliance can get the necessary fuel to function properly.
To turn on the gas supply, follow these steps:
- Locate the gas valve: The gas valve is usually located near the appliance or in the utility room where the gas line enters your house. It is typically a lever or a knob that controls the flow of gas to the appliance.
- Check the position of the gas valve: The valve should be in the “on” position, which is usually parallel to the gas pipe. If the valve is perpendicular to the pipe, it means that the gas supply is currently turned off.
- Turn on the gas valve: If the valve is in the “off” position, turn it to the “on” position by either flipping the lever or rotating the knob clockwise. Make sure to do this slowly and steadily to avoid any sudden gas flow.
- Listen for the gas flow: As you turn on the gas valve, listen carefully for any hissing sound. If you hear hissing, it could indicate a gas leak, and you should immediately turn off the gas supply and contact a professional for assistance.
- Inspect for gas odor: While the valve is in the “on” position, carefully sniff around the appliance and the gas valve for any unusual gas odor. If you detect the smell of gas, it could indicate a gas leak, and you should turn off the gas supply and seek professional help.
Once you have confirmed that the gas supply is turned on and there are no signs of gas leaks, you can proceed with relighting the pilot light on your appliance. Remember to follow the manufacturer’s instructions and safety guidelines for your specific appliance.
Testing the Relit Pilot Light
Once you have successfully relit the pilot light according to the proper steps, it is important to test whether the pilot light is functioning correctly. This will ensure that the appliance or equipment connected to the pilot light will operate safely and efficiently.
Follow the steps below to properly test the relit pilot light:
- Observe the pilot light flame: Take a close look at the pilot light flame. It should burn steadily and emit a blue flame. A steady blue flame indicates that the pilot light is burning the gas properly.
- Inspect for any abnormal flame behavior: Watch the pilot light flame for a few moments. If the flame flickers, sputters, or produces a yellow or orange color, this may indicate a problem. These issues may be caused by dirty or clogged burners, an incorrect gas-to-air ratio, or other malfunctions that require further inspection or maintenance.
- Check for gas leaks: Use a gas leak detector or a mixture of soapy water to check for gas leaks around the pilot light area. Apply the solution to the gas connections, tubing, and any joints or fittings. If you see bubbles forming after applying the solution, it indicates a gas leak. In this case, turn off the gas supply and consult a professional to fix the issue.
- Ensure proper ignition and reignition: Turn off the pilot light and wait for a few minutes. Then, attempt to reignite the pilot light using the proper steps again. If the pilot light ignites easily, this indicates that it is functioning correctly. If you encounter difficulties in igniting or reigniting the pilot light, it is recommended to contact a qualified technician to diagnose and fix the problem.
- Refer to the appliance or equipment manual: It is always recommended to consult the manual or manufacturer’s instructions for specific information on testing and troubleshooting the pilot light. Different appliances or equipment may have specific requirements or troubleshooting steps to follow.
Testing the relit pilot light is crucial to ensure the safety and proper functioning of the appliance or equipment. If any issues or abnormalities are detected during the testing process, it is advisable to seek professional assistance to address the problem.
Monitoring the Pilot Light for Fluctuations
After successfully relighting the pilot light, it is important to monitor it for any fluctuations in its appearance or behavior. This will help ensure that the pilot light is functioning properly and there are no potential issues or safety concerns.
Here are the steps to monitor the pilot light for fluctuations:
- Observe the color of the flame: A properly functioning pilot light should have a steady blue flame. If you notice any changes in color, such as a yellow or orange flame, it may indicate a problem with the gas mixture or combustion. In this case, it is best to turn off the pilot light and consult a professional for further assistance.
- Check for flickering: The flame of the pilot light should burn steadily without any flickering. If you notice that the flame is flickering or goes out intermittently, it could be a sign of a draft or air flow issue. Ensure that there are no drafts around the pilot light area and that the surrounding environment is properly ventilated.
- Look for a weak or small flame: A weak or small flame can indicate a clogged or dirty pilot light orifice. In this case, the orifice may need to be cleaned or replaced. Avoid attempting to clean the orifice yourself and seek help from a professional.
- Listen for unusual noises: While monitoring the pilot light, pay attention to any unusual noises, such as hissing or whistling sounds. These noises could indicate a gas leak or a problem with the gas supply. If you suspect a gas leak, immediately turn off the gas supply, open windows for ventilation, and contact your gas utility company or a professional technician.
Regularly monitoring the pilot light for fluctuations and addressing any issues promptly will help ensure the safety and efficiency of your appliance. It is always recommended to consult a professional if you are unsure about any aspect of relighting or monitoring the pilot light.
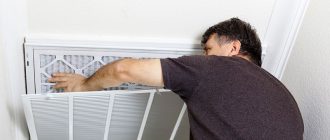
Scheduling Regular Maintenance Checks
Regular maintenance checks are essential for keeping your pilot light functioning properly and reducing the risk of accidents or malfunctions. By incorporating these checks into your routine, you can ensure the safety and efficiency of your pilot light.
1. Establish a Schedule: Set up a regular schedule for maintenance checks. This could be monthly, quarterly, or annually, depending on the specific requirements of your pilot light. Stick to this schedule to avoid forgetting important maintenance tasks.
2. Check the Manufacturer’s Guidelines: Consult the manufacturer’s guidelines or user manual for your specific pilot light model. Follow the recommended maintenance schedule and operations to ensure you’re taking the necessary steps to keep it in good working condition.
3. Inspect for Damage or Corrosion: During each maintenance check, visually inspect the pilot light for any signs of damage or corrosion. Look for rust, loose connections, or frayed wires. If you notice any issues, take appropriate action to address the problem or seek professional help if needed.
4. Clean the Pilot Light: Dust, dirt, and debris can accumulate over time and affect the performance of the pilot light. Regularly clean the pilot light assembly, making sure to turn off any gas supply beforehand. Use a soft brush or cloth to gently remove any buildup and ensure proper airflow.
5. Test the Pilot Light: As part of your maintenance routine, test the pilot light to ensure it ignites and stays lit. Follow the proper steps for relighting the pilot light and observe its behavior. If you notice any unusual flames or difficulty in lighting, it may indicate a problem that requires professional attention.
6. Lubricate Moving Parts: Certain pilot lights may have moving parts that require lubrication to function smoothly. Check the manufacturer’s guidelines to determine if lubrication is necessary and if so, use the recommended lubricant sparingly to keep the parts in good working condition.
7. Keep Records: Maintain a record of your maintenance checks for future reference. Include the date of each check, any observations made, and any actions taken. This record can help you track the pilot light’s performance over time and identify any recurring issues.
Scheduling regular maintenance checks is crucial for the proper functioning of your pilot light and ultimately, your safety. By following these steps and staying proactive, you can ensure that your pilot light remains in good condition and continues to provide reliable service.
Understanding Troubleshooting Tips
When it comes to relighting a pilot light, it’s important to troubleshoot any issues you may encounter along the way. Here are some helpful tips to keep in mind:
- Check the gas supply: Make sure that the gas supply to your appliance is turned on. If the gas supply is off, the pilot light will not ignite. You can check this by looking at the gas valve near the appliance and ensuring that it is in the “on” position.
- Inspect the pilot light: Take a close look at the pilot light to see if it is lit or not. If the pilot light is out, you will need to follow the proper steps to relight it. If the pilot light is on, but the appliance is not working, there may be other issues that need to be addressed.
- Check for blockages: Sometimes, the pilot light may not ignite because of blockages in the gas line or pilot tube. Use a small brush or compressed air to clean out any debris that may be obstructing the flow of gas.
- Inspect the thermocouple: The thermocouple is a safety device that senses whether the pilot light is lit or not. If the thermocouple is faulty or dirty, it may not allow the gas valve to open and the pilot light to ignite. Check the thermocouple for any signs of damage or dirt and clean or replace it if necessary.
- Check for gas leaks: Before relighting the pilot light, it’s important to check for any gas leaks. Use a gas leak detector or a mixture of soapy water and apply it to the gas fittings and connections. If you notice any bubbling or smell gas, turn off the gas supply immediately and contact a professional.
- Consult the manufacturer’s instructions: If you’ve followed all the troubleshooting tips and still can’t relight the pilot light, consult the manufacturer’s instructions for your specific appliance. The manufacturer’s instructions may contain additional troubleshooting steps or specific information that can help you resolve the issue.
Remember, if you are ever unsure or uncomfortable with relighting a pilot light, it’s always best to contact a professional for assistance. Safety should be your top priority when dealing with gas appliances.
Knowing When to Seek Professional Help
While relighting a pilot light can be a relatively simple task, there are some situations where it is best to seek professional help. Here are some signs that you should leave the job to an expert:
- Gas smell: If you notice a strong smell of gas when relighting the pilot light or in the vicinity of your gas appliance, it is crucial to stop what you are doing immediately. Gas leaks can be extremely dangerous and should be addressed by a professional technician who can identify and fix the issue.
- Repeated pilot light issues: If you find yourself needing to relight the pilot light frequently or it keeps going out soon after being relit, there may be a more significant problem at hand. A professional can diagnose and resolve any underlying issues that may be causing recurring pilot light problems.
- Lack of knowledge or confidence: If you are unsure of how to relight the pilot light correctly or lack the confidence to do so, it is best to call a professional. Improperly relighting a pilot light can lead to accidents or further damage to the appliance.
Remember, your safety should always be the top priority. If you encounter any of these situations or have any doubts about relighting the pilot light on your own, it is advisable to contact a licensed technician who has the expertise to handle the task safely and efficiently.
Ensuring Pilot Light Safety in the Future
Regular maintenance: One of the best ways to ensure pilot light safety in the future is by scheduling and conducting regular maintenance checks. This includes having a professional inspect your heating system at least once a year to ensure that all parts, including the pilot light, are working properly.
Keep the area clean: It is important to keep the area around the pilot light clean and free from any debris. Dust, dirt, or other flammable materials can interfere with the proper functioning of the pilot light, causing it to go out or producing unsafe conditions.
Proper ventilation: Make sure that there is proper ventilation in the area where the pilot light is located. Good airflow can prevent the accumulation of gas or other flammable substances that can pose a safety hazard.
Read the manual: Each heating system may have its own specific instructions for relighting the pilot light and for general maintenance. It is important to read and understand the manufacturer’s manual that comes with your heating system to ensure that you are following the proper procedures for relighting the pilot light.
Install carbon monoxide detectors: Carbon monoxide is a colorless and odorless gas that can be produced if the pilot light is not burning properly or if there is a gas leak. Installing carbon monoxide detectors in your home can help to alert you to the presence of this gas and prevent potential health risks.
Know the signs of a problem: Familiarize yourself with the signs that indicate a possible problem with the pilot light or the heating system in general. These signs may include frequent pilot light outages, strange odors, unusual sounds, or uneven heating. If you notice any of these signs, it is important to contact a professional technician for further inspection and repair.
Provide proper training: If you have multiple family members or residents in your home, make sure that everyone is properly trained on how to safely relight the pilot light and what steps to take in the event of a problem. This can help ensure that everyone knows how to act in the case of an emergency and prevent further damage or injury.
FAQ:
Why would I need to relight a pilot light?
You may need to relight a pilot light if the flame has gone out or if you are experiencing problems with your gas appliance.
What are the proper steps to safely relight a pilot light?
The proper steps to safely relight a pilot light are: 1. Turn off the gas supply to the appliance. 2. Locate the pilot light and make sure it is not lit. 3. Remove the cover or access panel to expose the pilot light. 4. Turn the gas control valve to the “off” position. 5. Wait for any residual gas to dissipate. 6. Turn the gas control valve to the “pilot” position. 7. Press and hold down the pilot light button or knob. 8. Use a long lighter or match to ignite the pilot light. 9. Continue holding the pilot light button or knob for about 30 seconds. 10. Release the button or knob and the pilot light should stay lit.
Is it safe to relight a pilot light by myself?
If you are comfortable working with gas appliances and follow the proper safety precautions, it can be safe to relight a pilot light by yourself. However, if you are unsure or uncomfortable, it is recommended to contact a professional gas fitter or technician to do the job.
What should I do if the pilot light won’t stay lit?
If the pilot light won’t stay lit, there may be a problem with the gas supply, the thermocouple, or the gas control valve. It is best to contact a professional to inspect and repair the appliance.
Can I relight the pilot light if I smell gas?
No, if you smell gas, it is important to leave the area immediately and contact the gas company or emergency services. Do not attempt to relight the pilot light or use any open flames or electrical devices until the situation has been assessed and resolved by a professional.
What is a pilot light?
A pilot light is a small flame that burns continuously in gas appliances to ignite the main burner when needed.