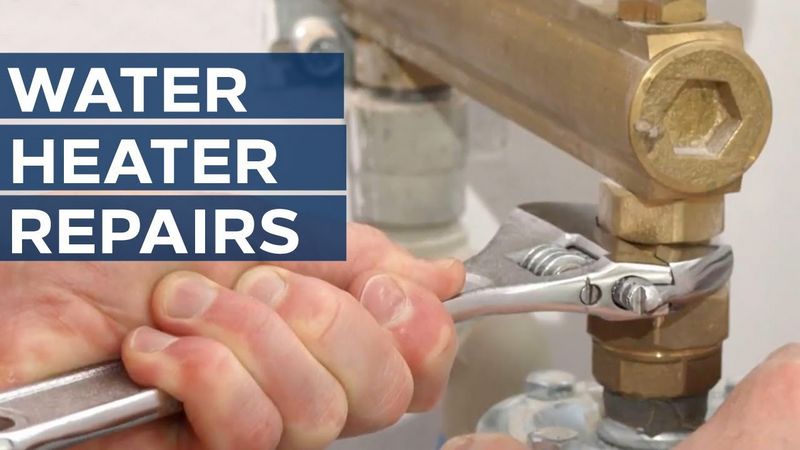
Fixing Common Water Heater Issues
When it comes to having hot water in our homes, the water heater plays a crucial role. Whether you’re taking a warm shower or washing your dishes, a functioning water heater is essential for everyday comfort. However, like any other appliance, water heaters can develop issues over time. From a lack of hot water to strange noises, these problems can be frustrating and disruptive. But fear not! This comprehensive guide will help you identify and fix common water heater issues, allowing you to restore hot water flow and avoid costly repairs.
One of the most common issues homeowners face with their water heaters is a lack of hot water. If you find yourself standing in a cold shower or waiting for ages for your taps to heat up, there could be a few possible reasons. This guide will walk you through the troubleshooting process, from checking the pilot light to inspecting the thermostat. Whether you have a gas or electric water heater, you’ll find step-by-step instructions to ensure a quick and efficient fix.
In addition to a lack of hot water, water heaters can also make strange noises that can be indicators of underlying issues. From rumbling and popping sounds to high-pitched whistles, these noises can be alarming. Thankfully, most of the time, these noises are not a cause for concern and can be resolved with a few simple adjustments. This guide will explain the common causes of these noises and provide you with the necessary steps to eliminate them, ensuring a quiet and efficient water heater.
Remember, safety should always be your top priority when dealing with water heater issues. If you are unsure or uncomfortable with the troubleshooting process, it’s best to call a professional plumber. They have the expertise and tools to diagnose and fix any water heater problem, ensuring your home has a reliable source of hot water.
By familiarizing yourself with the common issues and solutions outlined in this comprehensive guide, you’ll be equipped to handle most water heater problems that may arise. With proper maintenance and timely repairs, you can extend the lifespan of your water heater and enjoy hot water whenever you need it. So don’t let water heater issues dampen your day – tackle them head-on with confidence!
Identifying Common Water Heater Problems
Water heaters are an essential appliance in any home, providing hot water for showering, washing dishes, and other daily activities. However, they can sometimes encounter problems that can disrupt their performance. It is essential to be able to identify these common water heater problems to ensure timely repairs and avoid costly damages. Here are some common issues to look out for:
- No hot water: One of the most common problems with water heaters is the lack of hot water. This can be caused by a variety of issues, such as a faulty heating element, a broken thermostat, or a gas supply issue.
- Inadequate hot water: If your water heater is producing hot water, but it is not enough to meet your needs, there may be an issue with the size or capacity of the heater. It could also be caused by sediment buildup in the tank, affecting its efficiency.
- Leaking: Water heater leaks can be a serious problem and should be addressed immediately. Leaks can be caused by loose or damaged valves, a cracked tank, or a faulty pressure relief valve. Ignoring leaks can lead to water damage or potential safety hazards.
- Strange noises: Unusual noises coming from your water heater, such as popping, rumbling, or banging sounds, can indicate a buildup of sediment in the tank. This can reduce the efficiency of the heater and potentially cause damage to the tank if not addressed.
- Foul-smelling water: If your hot water has a strong, unpleasant smell, it could be due to bacterial growth in the tank. This can be solved by flushing the tank and disinfecting it with a diluted bleach solution.
- Fluctuating water temperature: If the temperature of your hot water constantly changes, it could be due to a malfunctioning thermostat or a buildup of sediment in the tank. Regular maintenance and flushing can help prevent this issue.
If you encounter any of these common water heater problems, it is recommended to contact a professional plumber or water heater technician. They will be able to diagnose the issue and provide the necessary repairs or replacements to restore your water heater’s functionality.
Troubleshooting an Electric Water Heater
If you’re experiencing issues with your electric water heater, here are some common problems you might encounter and possible solutions:
-
No hot water: If you’re not getting any hot water, first check if the water heater is receiving power. Ensure that the circuit breaker is not tripped and that the thermostat is set to the desired temperature. If the heater is still not working, it could be a faulty heating element, in which case you may need to replace it.
-
Inadequate hot water: If you’re not getting enough hot water, it could be due to a number of reasons. Check if the thermostat is set too low and adjust it as needed. Sediment buildup in the tank could also be affecting the heating efficiency. Consider flushing the tank to remove any sediment or contact a professional plumber for assistance.
-
Water is too hot: If the water is too hot, the thermostat may be set too high. Lower the temperature setting to a comfortable level. It’s important to note that water temperatures above 120°F (49°C) can cause severe burns, so make sure to set the thermostat accordingly.
-
Water has a strange odor or taste: If the hot water has a foul odor or unusual taste, it could be due to an accumulation of bacteria in the tank. Consider flushing the tank and adding a hydrogen peroxide solution to help disinfect it. If the problem persists, it’s advisable to contact a professional.
-
Water is leaking: If you notice water pooling around the base of the water heater, it could be a sign of a leak. First, check if any of the pipes or fittings are loose. Tighten them if necessary. If the leak persists, there may be a faulty valve or a crack in the tank, which would require professional repair or replacement.
Remember, if you’re not comfortable troubleshooting or fixing the issue yourself, it’s always best to contact a professional plumber who can properly diagnose and resolve the problem with your electric water heater.
Troubleshooting a Gas Water Heater
If you’re experiencing issues with your gas water heater, there are several troubleshooting steps you can take to identify and potentially fix the problem. Before attempting any repairs, it’s important to turn off the gas supply and consult the manufacturer’s guide.
No hot water
If your gas water heater is not producing any hot water, there are a few potential causes:
- Pilot light is out: Check if the pilot light is lit. If not, follow the manufacturer’s instructions to relight it.
- Thermocouple issue: The thermocouple is a device that senses the presence of the pilot flame. If it’s not working properly, it may shut off the gas supply. Replace the thermocouple if necessary.
- Gas supply issue: Ensure that the gas supply valve is fully open and that there are no gas leaks. If you suspect a gas leak, contact a professional immediately.
- Gas control valve issue: The gas control valve regulates the flow of gas to the burner. It may need to be adjusted or replaced.
Inadequate hot water
If your gas water heater is not providing enough hot water, consider the following possibilities:
- Sediment build-up: Over time, mineral sediment can accumulate at the bottom of the tank, reducing its efficiency. Drain and flush the tank to remove the sediment.
- Damaged dip tube: The dip tube is responsible for delivering cold water to the bottom of the tank. If it’s broken or corroded, it can affect the temperature of the hot water. Replace the dip tube if necessary.
- Undersized water heater: If your household’s hot water demand exceeds the capacity of the water heater, you may need to upgrade to a larger unit.
- Incorrect temperature settings: Check the temperature settings on the gas control valve. Adjust it if necessary, but be cautious not to set it too high to avoid scalding.
Poor water quality
If the hot water from your gas water heater has an unusual taste or odor, the following factors might be contributing:
- Anode rod issue: The anode rod helps prevent corrosion inside the tank. If it’s deteriorating, it can introduce unpleasant tastes or odors. Replace the anode rod if needed.
- Water quality issue: The source of your water may contain minerals or contaminants that affect its taste or odor. Consider installing a water filtration system to improve the quality.
If you’re unable to resolve the issue on your own or if you’re uncomfortable working with gas appliances, it’s recommended to contact a professional plumber or gas technician for assistance.
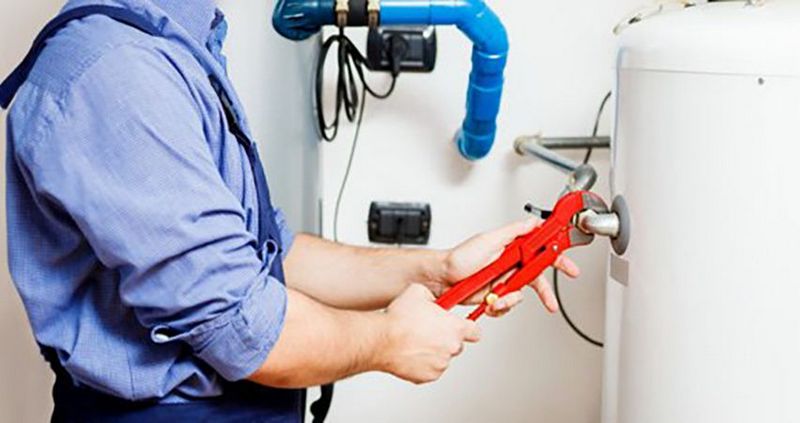
Fixing a Leaking Water Heater
If you notice a leak in your water heater, it is important to address the issue as soon as possible to prevent further damage. Here are some steps you can take to fix a leaking water heater:
- Turn off the power: Before you begin any repairs, make sure to turn off the power to the water heater. This will help prevent any accidents or injuries.
- Locate the source of the leak: Once the power is off, inspect the water heater to determine where the leak is coming from. Common sources of leaks include the pressure relief valve, drain valve, or the tank itself.
- Replace faulty valves: If the leak is coming from the pressure relief valve or drain valve, you may need to replace them. To do this, turn off the water supply to the heater, drain the tank, and then remove the faulty valve. Install a new valve and ensure it is tightly secured.
- Repair the tank: If the tank itself is leaking, the best solution may be to replace it. However, if the leak is small and manageable, you can attempt to repair it using a water heater repair kit. Follow the instructions provided with the kit to patch the leak.
- Check the temperature and pressure relief valve: A faulty temperature and pressure relief valve can also cause leaks. Test the valve by lifting the lever and allowing some water to flow out. If the valve doesn’t release water or continues to leak afterward, it may need to be replaced.
- Monitor for further leaks: After making repairs, it is important to monitor the water heater for any further leaks. Keep an eye on it for a few days to ensure that the issue has been fully resolved.
If you are unsure about fixing the leaking water heater yourself, it is recommended to seek the assistance of a professional plumber. They will have the necessary expertise and tools to diagnose and repair the issue effectively.
Resolving No Hot Water Issues
If you’re facing the frustrating issue of having no hot water, there are a few potential causes and solutions to consider. Follow these steps to help identify and resolve the problem:
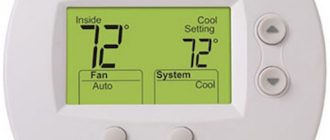
- Check the thermostat settings: Make sure the thermostat on your water heater is set to an appropriate temperature, usually between 120 to 140 degrees Fahrenheit. If the temperature is too low, your water may not be heating up enough.
- Inspect the pilot light: If you have a gas water heater, check the pilot light. If it’s out, relight it following the manufacturer’s instructions. A pilot light that won’t stay lit may indicate a faulty thermocouple, which may need to be replaced.
- Reset the high limit switch: The high limit switch is a safety feature that shuts off the power to the heating elements if the water temperature gets too high. Look for a red reset button on the thermostat or heating element compartment and press it to reset the switch.
- Test the heating elements: Electric water heaters have heating elements that can wear out over time. Use a multimeter to test the continuity of the elements. If they’re faulty, you’ll need to replace them.
- Flush the tank: Sediment buildup in the tank can cause heating problems. Drain a few gallons of water from the tank to flush out any sediment that has accumulated. Follow the manufacturer’s instructions for your specific water heater model.
- Check the circuit breaker: If you have an electric water heater, check the circuit breaker or fuse to ensure it hasn’t tripped or blown. Reset the breaker or replace the fuse if necessary.
- Inspect the dip tube: The dip tube is a tube that carries cold water to the bottom of the tank. If it’s broken or cracked, cold water may mix with hot water at the top, reducing the overall temperature. Replace the dip tube if necessary.
- Call a professional plumber: If you’ve tried these troubleshooting steps and still have no hot water, it may be time to call a professional plumber. They will have the expertise and tools to diagnose and fix more complex issues with your water heater.
Remember to always prioritize safety when working with a water heater. If you’re unsure about any steps or feel uncomfortable performing them, it’s best to seek professional help.
Repairing a Noisy Water Heater
Is your water heater making strange noises? Don’t worry, this is a common problem that can often be fixed with a few simple solutions. Below are some steps you can take to repair a noisy water heater.
- Flush the tank: Sediment buildup at the bottom of your water heater’s tank can cause banging or rumbling noises. To fix this, you’ll need to flush the tank. Start by turning off the power supply to the water heater and shutting off the cold water supply. Attach a garden hose to the drain valve at the bottom of the tank and place the other end of the hose in a drain or outside. Open the drain valve and let the water flow until it runs clear. This will help remove any sediment that may be causing the noise.
- Tighten loose connections: If you hear a rattling noise coming from your water heater, it could be due to loose connections. Check all the pipes, valves, and fittings connected to the water heater and tighten them if necessary. Use a wrench or pliers to securely fasten any loose connections.
- Insulate the pipes: If you hear banging or knocking noises when the water heater is heating up, it may be caused by expanding pipes. Insulating the hot and cold water pipes connected to the water heater can help reduce this noise. You can use foam pipe insulation or pipe wrap to wrap the pipes and prevent them from expanding and making noise.
- Replace worn out parts: Over time, components such as the heating element, dip tube, or pressure relief valve may wear out and cause noise. Inspect these parts and replace them if necessary. It’s recommended to call a professional plumber to handle any replacements, as working with water heaters can be dangerous and require specialized knowledge.
If you’ve tried these solutions and your water heater is still making noise, it may be a sign of a more serious problem. In such cases, it’s best to contact a professional plumber who can diagnose and fix the issue.
Remember to always exercise caution when working with water heaters, as they involve electricity, gas, and hot water. If you’re unsure or uncomfortable about performing any repairs, it’s better to seek professional help to avoid any accidents or further damage.
Fixing a Water Heater that Runs Out of Hot Water Too Quickly
If your water heater is running out of hot water too quickly, there are a few possible reasons for this issue. With some troubleshooting and minor adjustments, you may be able to resolve the problem without calling a professional plumber.
Here are some steps you can follow to fix a water heater that runs out of hot water too quickly:
- Check the thermostat: Make sure that the thermostat on your water heater is set to the desired temperature. If it is set too low, the water may not heat up enough to provide hot water for an extended period of time.
- Inspect the heating elements: Over time, the heating elements in your water heater may accumulate sediment or mineral buildup, causing them to become less efficient. Turn off the power supply to the water heater and remove the access panels to inspect the heating elements. If they are covered in scale or debris, clean them using a soft brush or vinegar. Alternatively, you may need to replace the heating elements altogether.
- Flush the tank: Sediment buildup inside the tank can reduce the amount of available hot water. To flush the tank, turn off the power supply and water supply to the water heater. Connect a garden hose to the drain valve at the bottom of the tank and open it. Let the water flow until it runs clear, indicating that the sediment has been flushed out. Close the drain valve and refill the tank before turning the power supply back on.
- Check the dip tube: The dip tube is responsible for delivering cold water to the bottom of the tank. If it is broken or deteriorated, cold water may mix with the hot water near the top of the tank, resulting in lukewarm water. Shut off the water supply to the water heater and drain some water from the tank to access the dip tube. Inspect it for signs of damage and replace it if necessary.
- Insulate the pipes: Hot water pipes that are not properly insulated can lose heat as the water travels from the water heater to the faucets. This can result in a decrease in hot water supply. Insulating the pipes can help retain heat and improve the overall efficiency of your water heater system.
If you have followed these troubleshooting steps and the issue prevails, it may be necessary to consult a professional plumber to further diagnose and fix the problem. They can help identify any underlying issues with your water heater and provide the appropriate solutions.
Remember to exercise caution when handling a water heater, as it involves working with electricity and water. Always turn off the power supply and water supply before conducting any maintenance or repairs.
Solving Water Heater Pilot Light Problems
If you’re experiencing issues with your water heater’s pilot light, it can be frustrating and inconvenient. However, there are several common problems that can cause the pilot light to go out or not stay lit. Here are some steps you can take to troubleshoot and fix these issues:
- Check for gas supply: Make sure that the gas supply to the water heater is turned on. If the gas supply valve is closed, open it to allow gas to flow to the pilot light.
- Inspect the thermocouple: The thermocouple is a safety device that detects the presence of a flame. If the thermocouple is dirty or bent, it may not be detecting the pilot light. Use a clean cloth to gently clean the thermocouple or adjust its position so that it is in close proximity to the flame.
- Relight the pilot light: If the pilot light has gone out, follow the manufacturer’s instructions to relight it. This usually involves turning the gas control knob to the pilot position, using a long lighter or match to ignite the pilot light, and holding down the reset or pilot button for a specified amount of time.
- Check the gas pressure: Low gas pressure can cause the pilot light to go out. Consult a professional to measure the gas pressure and make any necessary adjustments.
- Replace the thermocouple: If the pilot light still won’t stay lit, the thermocouple may need to be replaced. This is a relatively simple and inexpensive fix that can be done with basic tools.
If you’ve tried all these troubleshooting steps and still can’t get your water heater’s pilot light to stay lit, it’s best to contact a professional plumber or HVAC technician for further assistance. They will have the knowledge and expertise to diagnose and resolve the issue.
Remember, if you’re not comfortable working with gas or aren’t familiar with the inner workings of your water heater, it’s always safer to leave repairs to the professionals.
Repairing a Water Heater with Low Water Pressure
If you’re experiencing low water pressure in your water heater, there are a few steps you can take to potentially resolve the issue. Here are some troubleshooting tips:
- Check the water shut-off valve: Make sure the shut-off valve for your water heater is fully open. If it’s partially closed, it can restrict the flow of water and cause low water pressure.
- Inspect the pressure relief valve: The pressure relief valve is a safety device on your water heater that releases excess pressure. Check if it’s working properly and hasn’t become stuck or blocked. If it’s malfunctioning, it can affect water pressure.
- Check for any leaks: Inspect the water heater and its connections for any leaks. Even a small leak can lead to decreased water pressure. If you find any leaks, repair or replace the affected parts.
- Flush the water heater: Sediment buildup can restrict water flow and reduce pressure. To flush the water heater, turn off the power or gas supply, connect a hose to the drain valve, and open the valve to let the water and sediment drain out. Be sure to follow the manufacturer’s instructions.
- Inspect the plumbing system: Low water pressure in the water heater may be caused by issues with the overall plumbing system. Check for clogged pipes, valves, or faucets. If any are found, clean or replace them as necessary.
If you’ve tried these troubleshooting steps and are still experiencing low water pressure, it may be time to contact a professional plumber for further assistance. They can diagnose the problem and recommend appropriate repairs or replacements.
Note: It’s important to exercise caution when performing any maintenance or repairs on your water heater. If you’re unsure or uncomfortable with the process, it’s best to consult a professional.
Fixing Water Heater Temperature Control Issues
If you are experiencing temperature control issues with your water heater, there are a few possible causes and solutions to consider. Follow these steps to troubleshoot and fix the problem:
- Check the thermostat setting: Start by checking the thermostat setting on your water heater. Ensure that it is set to the desired temperature. If it is set too low, you may need to adjust it to a higher temperature to increase the hot water temperature.
- Test the thermostat: If the thermostat is set correctly but you are still experiencing temperature control issues, you should test the thermostat to see if it is functioning properly. Use a multimeter to check for continuity in the thermostat. If there is no continuity, it may need to be replaced.
- Inspect the heating elements: Another possible cause of temperature control issues is a faulty heating element. Turn off the power supply to the water heater and check the heating elements for any signs of damage or corrosion. If they appear to be in good condition, you can test them with a multimeter to ensure they are working properly. If a heating element is not functioning, it will need to be replaced.
- Flush the water heater: Over time, sediment and mineral deposits can build up in the water heater, affecting its performance. To address temperature control issues caused by buildup, you should flush the water heater regularly. Attach a hose to the drain valve and open it to allow the water and sediment to drain out. This can help improve the efficiency of the water heater and ensure better temperature control.
- Check for incoming cold water: If the water heater is not properly detecting incoming cold water, it may cause temperature control issues. Make sure that the cold water inlet valve is fully open and functioning correctly. If there are any issues with the valve, it may need to be replaced.
By following these steps, you should be able to troubleshoot and fix temperature control issues with your water heater. However, if the problem persists or you are unsure about any of the steps, it is recommended to contact a professional plumber for assistance.
Resolving Water Heater Smelly Water Problems
If the water coming out of your water heater has an unpleasant odor, it can be quite distressing. Smelly water can make it difficult to use your water heater for everyday tasks such as showering, washing dishes, or doing laundry. However, there are several possible causes for this issue, and most of them can be resolved easily.
1. Bacterial Growth: One common cause of smelly water is the growth of bacteria in your water heater. Bacteria can thrive in the warm environment of a water heater tank, especially when the tank is not properly maintained. To eliminate the bacterial growth, you can try flushing the water heater tank and disinfecting it. Some recommended disinfectants include hydrogen peroxide or chlorine bleach diluted in water. Follow the manufacturer’s instructions for proper usage and safety precautions.
2. Anode Rod Reaction: The anode rod in your water heater is designed to attract corrosive elements in the water to protect the tank from rusting. However, the reaction between the anode rod and these elements can sometimes produce a sulfur-like smell. Replacing the anode rod with a different material, such as aluminum or zinc, may help resolve this issue. Consult a professional plumber for assistance in selecting and installing the right type of anode rod for your water heater.
3. Sediment Buildup: Over time, sediment can accumulate in your water heater tank, creating a breeding ground for bacteria. Flushing the tank regularly can help remove the sediment and prevent odor-causing bacteria from growing. Consult the manufacturer’s instructions for proper flushing procedures, or hire a professional plumber to do the job.
4. Hydrogen Sulfide Gas: In some cases, the odor in the water may be caused by hydrogen sulfide gas, which can be present in well water or certain municipal water supplies. This gas usually has a “rotten egg” smell. Installing a hydrogen sulfide filtration system or contacting your local water treatment plant can help address this issue.
5. Plumbing Issues: Occasionally, the odor may not be coming from the water heater itself, but from the plumbing system. A qualified plumber can inspect your plumbing system and identify any issues that may be causing the smell. They can fix leaks, clean clogged pipes, or replace faulty components as needed.
Remember, if you are unsure about how to resolve the smelly water problem in your water heater, it is always best to seek professional help. An experienced plumber can diagnose the issue accurately and provide appropriate solutions to ensure your water heater is working properly and producing clean, odor-free water.
Repairing Water Heater Sediment Buildup
Sediment buildup is a common problem that can affect the performance and efficiency of your water heater. Over time, minerals and debris can accumulate at the bottom of the tank, reducing its capacity and leading to various issues such as reduced hot water supply, increased energy consumption, and even premature failure of the appliance. Fortunately, you can easily repair water heater sediment buildup by following these steps:
- Turn off the power supply to the water heater. This is crucial to ensure your safety during the repair process.
- Allow the water in the tank to cool down. Sediment buildup is more manageable when the water is not hot.
- Locate the drain valve at the bottom of the water heater. This valve is used to drain the tank.
- Attach a garden hose to the drain valve and position the other end in a suitable drainage area or container.
- Open the drain valve to start draining the water. Be careful as the water may be hot initially.
- Allow the tank to completely drain. This may take some time depending on the size of your water heater.
- Once the tank is empty, close the drain valve.
- With the drain valve closed, turn on the cold water supply to the water heater. This will help flush out any remaining sediment.
- Wait for a few minutes to allow the water to circulate within the tank.
- Repeat steps 4 to 8 if necessary, especially if you notice a significant amount of sediment during the draining process.
- Finally, turn on the power supply to the water heater and wait for the tank to refill with water.
Regularly repairing water heater sediment buildup can help extend the lifespan of your appliance and ensure efficient hot water supply. It is recommended to perform this maintenance task at least once a year or as needed depending on the quality of your water supply and the usage of the water heater.
Note: If you encounter any difficulties or if the sediment buildup is excessive, it is advisable to seek professional assistance. Professional plumbers have the necessary tools and expertise to effectively clean the water heater and address any issues that may arise during the process.
Fixing Water Heater Pressure Relief Valve Problems
A pressure relief valve is an important component of a water heater that helps to maintain safe pressure levels inside the tank. However, like any other part of a water heater, the pressure relief valve can develop problems over time. Here are some common pressure relief valve issues and how to fix them:
1. Leaking Pressure Relief Valve
If you notice that the pressure relief valve is leaking, it may be due to excessive pressure inside the tank. To fix this issue, you can try the following:
- Step 1: Turn off the power supply to the water heater.
- Step 2: Place a bucket under the valve to catch any water that may be released.
- Step 3: Lift the lever on the valve to manually release pressure.
- Step 4: If the valve continues to leak after releasing pressure, you may need to replace it with a new one.
2. Malfunctioning Pressure Relief Valve
Sometimes, the pressure relief valve may not be functioning properly, which can result in either too much or too little pressure inside the tank. Here’s what you can do to fix this issue:
- Step 1: Turn off the power supply to the water heater.
- Step 2: Place a bucket under the valve to catch any water that may be released.
- Step 3: Lift the lever on the valve to manually release pressure.
- Step 4: If the valve does not release any water or if it continues to release water excessively, you may need to replace it.
3. Rust or Sediment Buildup
Rust or sediment buildup can also cause pressure relief valve problems. To fix this issue, follow these steps:
- Step 1: Turn off the power supply to the water heater.
- Step 2: Place a bucket under the valve to catch any water that may be released.
- Step 3: Lift the lever on the valve to manually release pressure.
- Step 4: Use a brush or cloth to clean the valve and remove any rust or sediment buildup.
- Step 5: If the buildup is severe or if the valve is damaged, you may need to replace it.
It’s important to regularly check and maintain the pressure relief valve to ensure it is functioning properly. If you’re unsure about how to fix pressure relief valve problems or if the issue persists after attempting the above steps, it’s recommended to contact a professional plumber for assistance.
Maintenance Tips to Prevent Water Heater Issues
To ensure the long-lasting performance of your water heater and prevent costly repairs, regular maintenance is essential. By following these simple tips, you can keep your water heater in top condition:
- Flush the tank annually: Sediments and minerals can build up over time in the tank, reducing its efficiency. To prevent this, flush your water heater tank at least once a year. This will remove any built-up sediments and help improve its overall performance.
- Check the temperature and pressure relief valve: The temperature and pressure relief valve is a critical safety device that releases excess pressure in the tank. Regularly check this valve to ensure it is functioning properly. If you notice any leaks or signs of damage, contact a professional plumber for repairs.
- Inspect the anode rod: The anode rod is a sacrificial component that protects the tank from corrosion. Over time, the anode rod can become depleted and corroded, leading to tank damage. Check the anode rod annually and replace it if necessary.
- Insulate your water heater: Insulating your water heater can help reduce heat loss and save energy. Use an insulation blanket or jacket specifically designed for water heaters. Ensure that all safety labels and controls are still visible after insulation.
- Regularly check for leaks: Water leaks can cause significant damage to your water heater and surrounding areas. Periodically inspect your water heater for any signs of leaks, such as water pooling around the unit or wet spots on the floor. If you notice a leak, contact a professional plumber for immediate repairs.
- Keep the area around your water heater clear: Make sure there is enough space around your water heater for proper ventilation and access during maintenance or repairs. Remove any debris or clutter that may obstruct the unit.
- Follow manufacturer’s guidelines: Always refer to the manufacturer’s instructions for your specific water heater model. These guidelines will provide the recommended maintenance procedures and schedule to keep your water heater running efficiently.
By following these maintenance tips, you can prevent water heater issues, extend the lifespan of your unit, and save money on potential repairs or replacements.
Q&A:
What are some common water heater issues?
Some common water heater issues include not enough hot water, strange noises coming from the tank, water leaks, and low water pressure.
Why is my water heater not producing enough hot water?
There are several possible reasons for a water heater not producing enough hot water. It could be due to a malfunctioning heating element, a faulty thermostat, sediment buildup in the tank, or a broken dip tube.
How do I fix a water heater that is leaking?
The first step in fixing a water heater leak is to determine the source of the leak. It could be a leak from the temperature and pressure relief valve, a leak from the drain valve, or a leak from the tank itself. Once the source is identified, the appropriate repairs can be made.
Why is my water heater making strange noises?
Strange noises coming from a water heater can indicate several issues, such as sediment buildup in the tank, a malfunctioning heating element, or a loose or faulty valve. Flushing the tank to remove sediment and checking the valves can help resolve the issue.
What can cause low water pressure in a water heater?
Low water pressure in a water heater can be caused by a variety of issues, including a clogged pipe, a faulty pressure regulator, a leak in the system, or a partially closed shut-off valve. Identifying and addressing the specific cause can help restore normal water pressure.
What are the common issues with water heaters?
Common issues with water heaters include no hot water, inadequate hot water, strange noises, leaks, and a pilot light that won’t stay lit.