Proper Maintenance Techniques for Flushing a Tankless Water Heater
Maintenance is key to ensuring the longevity and efficiency of any appliance, and tankless water heaters are no exception. Regular maintenance techniques, such as flushing, can help optimize the performance of your tankless water heater and prevent issues that may arise from sediment build-up or mineral deposits.
Flushing a tankless water heater is a proper and necessary procedure that involves removing any accumulated debris from the unit’s heat exchanger. Over time, mineral deposits, scale, and sediment can accumulate inside the exchanger, reducing its efficiency and affecting the unit’s overall performance.
So, how-to flush a tankless water heater? It’s not as complicated as it may sound. By following a few simple steps, you can effectively flush your tankless water heater and keep it running smoothly for years to come. However, it is important to note that the exact flushing process may vary depending on the specific make and model of your tankless water heater, so it is essential to consult the manufacturer’s instructions before proceeding.
Maintaining Your Tankless Water Heater for Optimal Performance
Proper maintenance is essential to keep your tankless water heater functioning at its best. By following these how-to techniques, you can ensure that your heater continues to provide hot water efficiently.
1. Regularly flush your tankless water heater:
- Flushing your tankless water heater is an important maintenance step that helps remove sediment and mineral buildup, preventing clogs and damage to the unit.
- Follow the manufacturer’s instructions for flushing your specific tankless water heater model.
- Typically, the process involves shutting off the power and water supply, connecting a hose to the drain valve, and flushing the tankless water heater with a vinegar solution or descaling agent.
- Flush your tankless water heater at least once a year to keep it in optimal condition.
2. Check and clean the filters:
- Tankless water heaters have filters that help prevent debris from entering the unit and affecting its performance.
- Regularly inspect the filters for any dirt or blockages.
- Clean the filters by rinsing them with water or using a soft brush to remove any buildup.
- Make sure to follow the manufacturer’s instructions for cleaning the filters.
3. Inspect the venting system:
- The venting system of your tankless water heater plays a crucial role in expelling combustion gases.
- Inspect the venting system regularly for any obstructions or signs of damage.
- Ensure that the vents are clear of debris and are properly sealed.
- If you notice any issues with the venting system, contact a professional for assistance.
4. Schedule professional maintenance:
- In addition to regular DIY maintenance, it is recommended to schedule professional maintenance for your tankless water heater.
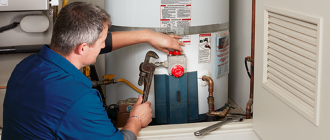
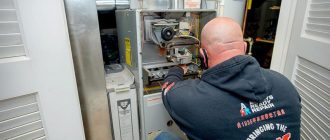
- A certified technician can perform a thorough inspection, clean the internal components, and identify any potential issues.
- Professional maintenance will help extend the lifespan of your tankless water heater and ensure optimal performance.
By following these proper maintenance techniques, you can keep your tankless water heater in excellent condition, improving its efficiency and prolonging its lifespan.
Flushing your Tankless Water Heater: A Step-by-Step Guide
Proper maintenance of your tankless water heater is necessary to ensure its longevity and optimal performance. One important maintenance task is to flush the system regularly, which helps remove mineral deposits and debris that can build up over time. Flushing your tankless water heater can also improve its energy efficiency and prevent potential issues such as reduced water flow or even damage to the unit.
Follow these step-by-step techniques to flush your tankless water heater effectively:
- Review the manufacturer’s instructions: Before you begin, consult the owner’s manual or the manufacturer’s website for specific instructions on flushing your particular model. Each tankless water heater may have slightly different flushing procedures, so it’s essential to familiarize yourself with the manufacturer’s recommendations.
- Gather the necessary tools and materials: You will need a bucket or hose, a sump pump or a submersible pump, white vinegar or a descaling solution recommended by the manufacturer, and a wrench or pliers for disconnecting the water and gas supply lines if necessary.
- Turn off the power supply: Locate the electrical circuit breaker that controls the tankless water heater and switch it off. This precaution is crucial to prevent accidents while performing maintenance tasks.
- Shut off the water supply: Locate the shut-off valve connected to the tankless water heater and close it to stop the flow of water into the unit.
- Disconnect the water and gas supply lines: If required by the manufacturer’s instructions, use a wrench or pliers to disconnect the water and gas supply lines from the tankless water heater. This step ensures that no water or gas is flowing into the unit while you proceed with the flushing process.
- Attach the pump to the water inlet: Connect the sump pump or submersible pump to the water inlet of the tankless water heater. You can also use a bucket or hose to manually pour water into the unit.
- Circulate the cleaning solution: Follow the manufacturer’s instructions on the appropriate amount of white vinegar or descaling solution to use. Start the pump, or manually pour the solution into the tankless water heater using the bucket or hose. Allow the cleaning solution to circulate through the unit for the recommended amount of time.
- Flush with clean water: After the cleaning solution has circulated, disconnect the pump and drain the solution from the tankless water heater. Reconnect the water and gas supply lines if you had disconnected them earlier. Open the shut-off valve to allow clean water to flow through the system and flush out any remaining residue.
- Power up the tankless water heater: Once you have flushed the system with clean water, restore power to the tankless water heater by turning on the electrical circuit breaker. Wait for the unit to heat the water to the desired temperature, and check for any leaks or issues.
- Maintain a regular flushing schedule: To maximize the performance and lifespan of your tankless water heater, incorporate regular flushing into your maintenance routine. Depending on the water quality and usage, flushing every six to twelve months is generally recommended.
By following these proper maintenance techniques and regularly flushing your tankless water heater, you can ensure its efficient operation and prolong its lifespan, avoiding potential issues and costly repairs.
Why Regular Maintenance is Important for Your Tankless Water Heater
Proper maintenance techniques, such as how to flush a tankless water heater, are essential for the longevity and efficiency of your system. Regular maintenance ensures that your tankless water heater continues to function optimally, providing you with a reliable source of hot water.
One of the key reasons why regular maintenance is important for your tankless water heater is to prevent sediment buildup. Over time, minerals and debris can accumulate inside the heater, leading to reduced performance and potential damage. Flushing the tankless water heater helps remove these sediments, ensuring smooth operation and increased efficiency.
In addition to preventing sediment buildup, regular maintenance also helps identify and address any potential issues early on. By inspecting the various components of your tankless water heater, such as the heat exchanger and valves, you can catch any signs of wear or damage before they escalate into costly repairs or complete system failure.
Furthermore, performing regular maintenance on your tankless water heater improves its overall energy efficiency. When sediments build up inside the heater, it requires more energy to heat the water, resulting in higher utility bills. By flushing the tankless water heater and keeping it clean, you can ensure that it operates at its maximum efficiency, saving you money in the long run.
Lastly, regular maintenance can help extend the lifespan of your tankless water heater. By taking the time to properly care for your heater, you can prevent unnecessary wear and tear, ensuring that it continues to provide hot water for many years to come. This not only saves you money on replacement costs but also reduces the environmental impact of disposing of a prematurely failed water heater.
In conclusion, regular maintenance is vital for your tankless water heater. By following proper maintenance techniques, such as flushing the heater, you can prevent sediment buildup, identify potential issues early on, improve energy efficiency, and extend the lifespan of your system. Don’t overlook the importance of regular maintenance to keep your tankless water heater in top condition.
Tankless Water Heater Flushing Frequency: How Often Should You Do It?
Proper maintenance is crucial to ensure the longevity and efficiency of your tankless water heater. One essential maintenance task is flushing the unit regularly. Flushing your tankless water heater helps remove mineral deposits and sediment that can accumulate over time and impact its performance.
So, how often should you flush your tankless water heater? The frequency of flushing depends on several factors, including the hardness of your water and the manufacturer’s recommendations. In general, it is recommended to flush your tankless water heater at least once a year.
If you live in an area with hard water, where mineral deposits are more likely to accumulate, you may need to flush your tankless water heater more frequently. Hard water contains a high concentration of minerals like calcium and magnesium, which can build up and hinder the proper functioning of your unit. Flushing the water heater helps remove these deposits, preventing clogs and maintaining optimal performance.
It’s also essential to consult your manufacturer’s guidelines for specific flushing recommendations. Some manufacturers may recommend flushing your tankless water heater every six months or even quarterly, depending on the model and local water conditions. Following the manufacturer’s guidelines ensures that you are performing the necessary maintenance steps to keep your tankless water heater in optimal condition.
In addition to frequency, it is important to know how to flush your tankless water heater properly. Each unit may have specific instructions, so consult your user manual for guidance. Generally, the flushing process involves turning off the power and water supply, connecting a hose to the cold-water inlet and a drain valve, and flushing through the unit with a vinegar solution or a descaling agent tailored for tankless water heaters.
Regular flushing of your tankless water heater not only maintains its efficiency and performance but also extends its lifespan. By removing mineral deposits and sediment buildup, you can prevent damage to internal components and reduce the risk of malfunctions or breakdowns.
To summarize, the frequency of flushing your tankless water heater depends on factors like water hardness and manufacturer recommendations. Generally, it is advisable to flush it at least once a year, but more frequent flushing may be necessary if you have hard water. Following proper flushing techniques and consulting your manufacturer’s guidelines will ensure that you maintain a properly functioning tankless water heater for years to come.
Signs That Your Tankless Water Heater Needs Flushing
Regular maintenance of your tankless water heater is essential to ensure it continues to function properly. One important maintenance task is flushing the water heater to remove any buildup and sediment that can affect its performance. But how do you know when it’s time to flush your tankless water heater? Here are some signs that indicate your water heater needs flushing:
| Sign | Description |
|---|---|
| 1 | Decreased hot water flow |
| 2 | Fluctuating water temperature |
| 3 | Strange noises coming from the water heater |
| 4 | Longer heating time |
| 5 | Increased energy consumption |
If you notice any of these signs, it’s time to flush your tankless water heater. Flushing the water heater will help remove mineral deposits and sediment that can accumulate over time and hinder its performance.
To flush your tankless water heater, follow these steps:
- Turn off the power to the water heater.
- Close the cold water supply valve.
- Attach a hose to the flush port of the water heater.
- Place the other end of the hose in a bucket or drain.
- Open the hot water tap and the flush port valve.
- Let the water heater flush for about 45 minutes or until the water runs clear.
- Close the flush port valve and remove the hose.
- Open the cold water supply valve and let the water heater refill.
- Turn on the power to the water heater.
Following these proper flushing techniques will help keep your tankless water heater in optimal condition, ensuring that you have a reliable and efficient source of hot water.
Tools and Materials Needed for Flushing Your Tankless Water Heater
Proper maintenance techniques for a tankless water heater require periodic flushing to remove sediment and mineral buildup. This helps to maintain the efficiency and longevity of the unit. Here are the essential tools and materials you’ll need to complete the flushing process:
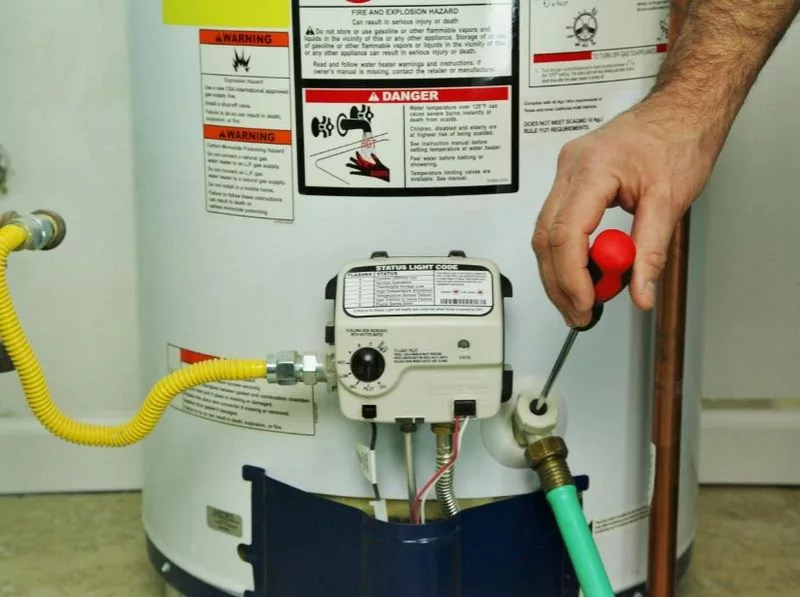
1. Screwdriver: You may need a screwdriver to access the water heater’s control panel or remove any covers that are blocking the access points.
2. Bucket or Drain Pan: Flushing the water heater will create a flow of water mixed with sediment and debris. It’s important to have a bucket or drain pan in place to collect this water and prevent any spills or messes.
3. Hose: A hose is necessary to connect to the water heater and allow the water mixed with sediment to drain safely into a suitable location, such as a floor drain or outside.
4. Descaling Solution: Depending on the level of mineral buildup in your tankless water heater, you may need to use a descaling solution. This solution helps break down and dissolve the minerals, making them easier to flush out.
5. Pump or Circulation Kit: If your tankless water heater is heavily affected by mineral buildup, you may need to use a pump or circulation kit to help flush out the accumulated sediment more effectively. This ensures a thorough cleaning of the unit.
6. Gloves and Safety Glasses: It’s always a good idea to wear protective gloves and safety glasses during the flushing process, as it involves handling potentially hot water and chemicals.
With these tools and materials on hand, you’ll be well-prepared to properly flush your tankless water heater and keep it in optimal condition.
Preparing Your Tankless Water Heater for Flushing
Proper maintenance techniques are essential for the longevity and efficiency of your tankless water heater. One important maintenance task is regular flushing to remove sediment and mineral buildup. Before starting the flushing process, there are a few steps you need to take to properly prepare your tankless water heater.
The first step is to turn off the power to the heater. Locate the circuit breaker or disconnect switch and either switch it off or remove the fuse. This will ensure that there is no power going to the unit while you are performing the maintenance.
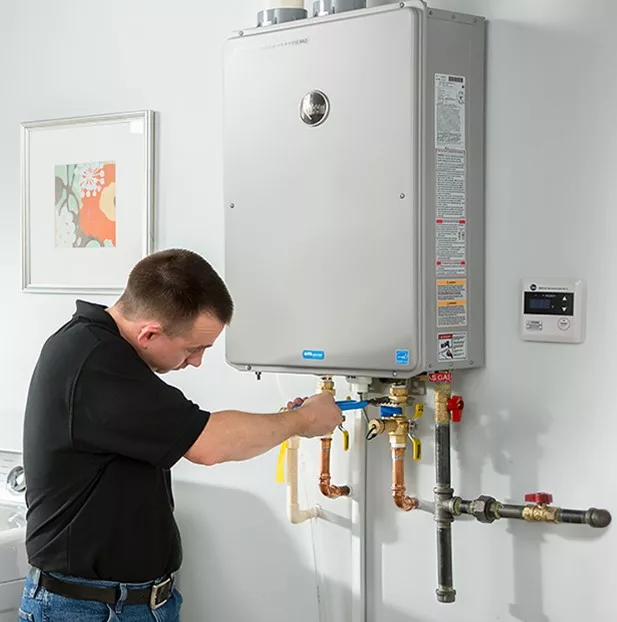
Next, locate the isolation valves on the cold water inlet and hot water outlet of the tankless water heater. These valves allow you to isolate the unit from the rest of the plumbing system. Close both of these valves to prevent water from flowing into or out of the water heater during the flushing process.
Once the isolation valves are closed, you will need to connect a hose to the cold water inlet valve. The other end of the hose should be placed in a bucket or drain to catch the water that will be flushed out of the heater. This will prevent any water damage or flooding during the flushing process.
After the hose is securely attached, you can open the pressure relief valve on the tankless water heater. This will allow air to enter the system and help with the draining process. Opening the pressure relief valve will also prevent any vacuum from forming inside the unit.
With the power turned off, isolation valves closed, hose connected, and pressure relief valve open, you are now ready to flush your tankless water heater. Follow the proper flushing techniques recommended by the manufacturer of your specific tankless water heater model to ensure a thorough cleaning.
| Step | Description |
|---|---|
| Step 1 | Turn off the power to the tankless water heater. |
| Step 2 | Close the isolation valves on the cold water inlet and hot water outlet. |
| Step 3 | Connect a hose to the cold water inlet valve and place the other end in a bucket or drain. |
| Step 4 | Open the pressure relief valve on the tankless water heater. |
| Step 5 | Follow the manufacturer’s instructions for flushing the tankless water heater. |
By properly preparing your tankless water heater for flushing, you can ensure that the maintenance process goes smoothly and effectively removes any sediment or mineral buildup from the system. Regular flushing will help to maintain the efficiency and performance of your tankless water heater for years to come.
The Flushing Process: Step 1 – Turn Off the Power Supply
Proper maintenance techniques are essential for ensuring the longevity and efficiency of your tankless water heater. One crucial step in the maintenance process is to regularly flush out the system to remove any mineral buildup or sediment that can hinder its performance.
Before you can begin the flushing process, the first step is to turn off the power supply to the tankless water heater. This is necessary to prevent any potential accidents or electrical mishaps while working on the unit.
To turn off the power supply:
- Locate the power switch or breaker that controls the tankless water heater.
- Flip the switch to the “Off” position or switch off the breaker corresponding to the heater.
- Ensure that the power is completely off by testing the unit with a voltage tester.
By turning off the power supply, you eliminate the risk of electric shock and ensure a safe working environment for the flushing process. Remember to follow safety precautions and always prioritize your well-being.
Once you have successfully turned off the power supply, you can proceed to the next step in the flushing process, which involves preparing the necessary equipment and tools.
The Flushing Process: Step 2 – Turning Off the Water Supply
Proper maintenance techniques are essential for keeping your tankless water heater running efficiently. One crucial step in the flushing process is turning off the water supply. By doing this, you ensure that no water enters the heater while the flushing is being performed.
To turn off the water supply to your tankless water heater, follow these steps:
- Locate the main water shut-off valve in your home. This valve is typically located near the water meter or where the main water line enters your property.
- Turn the valve clockwise to shut off the water supply. This will prevent any water from flowing into the heater during the flush.
- Once you have turned off the main water supply, open a hot water faucet in your home to relieve any pressure that may be present in the water lines.
It is important to note that turning off the water supply is a critical step in the flushing process. Failing to do so may result in water entering the tankless water heater, causing damage to the unit and reducing its lifespan.
By following these simple steps, you can ensure that your tankless water heater is properly flushed, maintaining its efficiency and prolonging its life.
The Flushing Process: Step 3 – Draining the Water from Your Tankless Water Heater
Proper maintenance of a tankless water heater is essential to ensure its longevity and efficiency. Flushing the system regularly is one of the key techniques for keeping your heater in optimal condition. In this step-by-step guide, we will show you how to drain the water from your tankless water heater to complete the flushing process.
Step 1: Turn off the power supply to your tankless water heater. This is crucial for your safety as well as preventing any potential damage to the unit during the draining process. Locate the electrical disconnect switch and turn it off.
Step 2: Close the cold water supply valve. This valve is usually located on the cold water inlet pipe. Turn it clockwise until it is fully closed to prevent any new water from entering the heater while you are draining it.
Step 3: Locate the drain valve on your tankless water heater. It is usually located near the bottom of the unit. Attach a garden hose to the drain valve and make sure the other end of the hose is positioned in a suitable drain location.
Step 4: Open the drain valve by turning it counterclockwise. This will allow the water to start flowing out through the garden hose. Be cautious as the water may be hot, so wear protective gloves and clothing if necessary.
Step 5: Let the water flow out completely until it runs clear. This may take a few minutes, depending on the size of your tankless water heater. It is important to remove any sediment, minerals, or debris from the system to maintain its efficiency.
Step 6: Once all the water has drained out, close the drain valve by turning it clockwise. Remove the garden hose and ensure that the valve is tightly closed to prevent any leaks.
Step 7: Open the cold water supply valve to allow fresh water to enter the tankless water heater. This will refill the system and prepare it for normal operation.
Step 8: Finally, turn on the power supply to your tankless water heater and wait for it to heat the water to your desired temperature. Your tankless water heater is now flushed and ready for use.
By following these proper maintenance techniques for flushing a tankless water heater, you can ensure its longevity, efficiency, and optimal performance. We recommend performing this flushing process at least once a year, although it may vary depending on your water quality and usage. Regular maintenance will help prevent sediment build-up and maximize the lifespan of your tankless water heater.
The Flushing Process: Step 4 – Cleaning the Inlet Filter and Water Filter
As part of the proper maintenance techniques for your tankless water heater, it is essential to regularly clean the inlet filter and water filter. These filters play a vital role in ensuring the heater operates efficiently and maintains the highest water quality.
The inlet filter is located at the cold water inlet connection on the heater unit. Its purpose is to prevent any debris or sediment from entering the unit and causing damage to the internal components. Over time, this filter can become clogged and restrict the flow of water, affecting the performance of the heater.
To clean the inlet filter, follow these steps:
- Turn off the water supply to the heater. This is usually done by closing the main water valve.
- Locate the inlet filter on the cold water inlet connection of the heater unit.
- Carefully remove the filter from the unit, taking care not to damage it.
- Rinse the filter under running water to remove any debris or sediment. Use a soft brush if necessary to gently scrub away any stubborn particles.
- Inspect the filter for any signs of damage or wear. If the filter is damaged, it should be replaced with a new one.
- Once the filter is clean and in good condition, reinsert it into the unit.
- Turn on the water supply and check for any leaks.
In addition to the inlet filter, some tankless water heaters also have a water filter installed on the cold water supply line. This filter helps remove impurities such as sediment, rust, or scale from the water before it enters the heater. It is important to clean or replace this filter regularly to ensure optimal performance.
To clean the water filter, follow these steps:
- Turn off the water supply to the heater.
- Locate the water filter on the cold water supply line.
- Remove the filter housing by unscrewing it in a counterclockwise direction.
- Take out the filter element from the housing.
- Rinse the filter element under running water to remove any debris or sediment.
- If necessary, use a soft brush to gently scrub away any stubborn particles.
- Inspect the filter element for any signs of damage or wear. If it is damaged, replace it with a new one.
- Once the filter element is clean and in good condition, reinsert it into the housing.
- Screw the filter housing back onto the water supply line in a clockwise direction.
- Turn on the water supply and check for any leaks.
By regularly cleaning the inlet filter and water filter of your tankless water heater, you can ensure its optimal performance and prolong its lifespan. Follow these proper maintenance techniques, and enjoy the benefits of a well-maintained water heater.
The Flushing Process: Step 5 – Flushing the Tankless Water Heater with Vinegar Solution
Flushing your tankless water heater is an essential part of its proper maintenance techniques. By regularly flushing the heater, you can remove mineral deposits and debris that can build up over time, ensuring optimal performance and prolonging the lifespan of your unit. In this step-by-step guide, we will walk you through the process of flushing your tankless water heater with a vinegar solution.
- Before starting the flushing process, ensure that the gas or power supply to the water heater is turned off.
- Close the hot water valves on the unit to prevent any water from flowing into the system during the flushing process.
- Connect a hose to the cold water inlet valve of the tankless water heater.
- Place the other end of the hose into a bucket or drain to collect the water and vinegar solution.
- Prepare a vinegar solution by mixing equal parts of white vinegar and water. For example, if you have one gallon of water, mix it with one gallon of white vinegar.
- Slowly open the cold water inlet valve to allow the vinegar solution to flow into the tankless water heater.
- Let the vinegar solution circulate through the heater for about 45 minutes to an hour. This will help dissolve and remove mineral deposits and scale buildup inside the unit.
- After the allotted time, close the cold water inlet valve and disconnect the hose.
- Open the hot water valves on the unit to flush out any remaining vinegar solution.
- Turn on the gas or power supply to the water heater.
- Lastly, check for any leaks or irregularities in the system before using the tankless water heater.
Flushing your tankless water heater with a vinegar solution should be done at least once a year. However, if you live in an area with hard water or notice a decrease in the heater’s performance, more frequent flushing may be necessary. By following this step-by-step guide, you can ensure that your tankless water heater operates efficiently and provides hot water on demand for years to come.
Post-Flushing Care: Refilling and Restarting Your Tankless Water Heater
After completing the flushing process for your tankless water heater, it is important to follow proper post-flushing care to ensure optimal performance and longevity of your heater. Here are the steps to refill and restart your tankless water heater:
- Close the drain valve and remove the flushing kit from the heater.
- Turn off the isolation valves that were opened during the flushing process.
- Open the main water supply valve to allow water to flow into the heater.
- Check for any leaks around the connections and ensure they are tightly sealed.
- Turn on the power to the heater by flipping the appropriate switch or pressing the power button.
- Set the desired temperature using the control panel of the heater.
- Wait for the heater to heat up the water. This may take a few minutes depending on the model and size of the heater.
- Once the water is heated, test the hot water supply at various faucets to ensure it is flowing properly.
- Monitor the heater for any signs of malfunctions or unusual behavior during the initial use.
Following these steps will help you properly refill and restart your tankless water heater after flushing. Regular maintenance and flushing are essential to keep your heater in good working condition and extend its lifespan.
Q&A:
Why is it important to flush a tankless water heater?
Flushing a tankless water heater is important because it helps remove mineral buildup, which can reduce the efficiency and lifespan of the unit. It also helps prevent clogs and improve the overall performance of the heater.
How often should a tankless water heater be flushed?
The frequency of flushing a tankless water heater depends on the water conditions in your area. However, it is generally recommended to flush the unit at least once a year to maintain optimal performance. If your water is particularly hard, more frequent flushing may be necessary.
What are the steps involved in flushing a tankless water heater?
The steps involved in flushing a tankless water heater include turning off the power and gas supply, shutting off the cold water supply, attaching hoses to the hot and cold water valves, draining the unit, descaling the heat exchanger, and finally, reassembling the unit and restoring the power and gas supply.
What tools and materials are needed to flush a tankless water heater?
The tools and materials needed to flush a tankless water heater include a screwdriver, a bucket or drain pan, a pair of pliers, a submersible pump or a water hose, white vinegar or a descaling solution, and gloves and safety glasses for protection.
What are the signs that a tankless water heater needs to be flushed?
The signs that a tankless water heater needs to be flushed include reduced hot water flow, fluctuating water temperature, strange noises coming from the heater, and an increase in energy consumption. If you notice any of these signs, it is likely time to flush your tankless water heater.