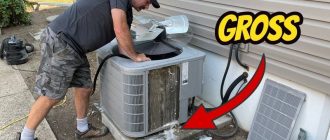
How do you clean condenser coils?
Regular cleaning and maintenance of the condenser coils in your refrigerator is essential to keep it running efficiently. Over time, dirt and dust can accumulate on the coils, causing the refrigerator to work harder and consume more energy. In this step-by-step guide, we will show you how to effectively clean the condenser coils to ensure optimal performance and extend the lifespan of your appliance.
The first step in cleaning the condenser coils is to disconnect the refrigerator from the power source. This is crucial to avoid any electric shocks or damage to the appliance. Once the refrigerator is unplugged, locate the condenser coils. They are typically found at the back or underneath the refrigerator, depending on the model.
Next, use a brush or a vacuum cleaner with a brush attachment to remove any loose dirt and debris from the coils. It is important to be gentle while brushing to avoid damaging the delicate fins of the coils. Take your time and make sure to remove as much dirt as possible.
After brushing, you can further clean the coils by using a coil cleaning solution. This solution is specifically designed to remove stubborn dirt and greasy residues from the coils. Follow the manufacturer’s instructions and apply the solution to the coils, letting it sit for a few minutes. Then, rinse the coils thoroughly with water to remove any remaining cleaning solution.
Once the coils are clean, allow them to dry completely before plugging the refrigerator back in. This will prevent any moisture from accumulating inside the appliance. Finally, remember to clean the area surrounding the condenser coils by removing any dust or dirt that may have accumulated.
In conclusion, regular cleaning and maintenance of the condenser coils is essential to keep your refrigerator running efficiently. By following this step-by-step guide, you can effectively clean the coils and ensure optimal performance. Remember to disconnect the power source, use a brush or vacuum to remove dirt, apply a coil cleaning solution if necessary, rinse thoroughly, and allow the coils to dry before reconnecting the refrigerator. With proper cleaning and maintenance, your refrigerator will continue to keep your food fresh for years to come.
Prepare the necessary equipment
Before you begin the cleaning process, make sure you have all the necessary equipment on hand. This will ensure that you can effectively clean the condenser coils of your refrigerator and remove any built-up dust or dirt. Here are the items you will need:
1. Cleaning brush: A soft-bristle brush is ideal for gently removing dust and debris from the coils. Make sure the brush is clean and free of any dirt or oils before using it.
2. Vacuum cleaner: A handheld vacuum with a nozzle attachment is perfect for sucking up any loose dirt or dust that may have accumulated on the coils.
3. Cleaning solution: You may choose to use a mild detergent or a specialized coil cleaner solution. Whichever option you choose, be sure to follow the manufacturer’s instructions and dilute the solution if necessary.
4. Safety gloves: It’s important to protect your hands from any sharp edges or chemicals that may be encountered during the cleaning process. Wearing safety gloves will keep your hands safe and free from any potential harm.
By gathering these essential items before starting, you will be ready to tackle the task of cleaning your refrigerator’s condenser coils effectively.
Turn off the power
Before you start the maintenance process of cleaning condenser coils, it is essential to turn off the power to prevent any potential accidents or damage. Find the power switch or unplug the refrigerator from the electrical outlet.
By turning off the power, you ensure your safety as well as avoid any risk of electric shock. Additionally, this step also protects the condenser coils from any potential damage that may occur while cleaning.
An essential tip to remember is to never clean the condenser coils while the power is still on. The vacuum or brush you use during the cleaning process can accidentally touch the live wires, causing electric shock.
By turning off the power, you can clean the condenser coils thoroughly without worrying about any electrical hazards. This step also allows you to access the coils more easily and clean away any dirt, dust, or debris that may have accumulated over time.
Remove the outer panel
Before starting the cleaning process, it is important to remove the outer panel of the condenser coils. The outer panel is usually located at the back or bottom of the refrigerator.
To remove the outer panel, first ensure that the refrigerator is unplugged. This is for safety reasons and to avoid any accidental damage to the condenser coils or other parts of the refrigerator.
Once the refrigerator is unplugged, use a screwdriver or a appropriate tool to remove the screws or clips that hold the outer panel in place. Carefully remove the panel and set it aside.
Inspect the outer panel for any dirt or dust buildup. If there is any dirt or dust, use a vacuum cleaner with a brush attachment to gently remove the debris. Make sure to clean both sides of the panel thoroughly.
After cleaning the outer panel, set it aside and proceed to the next step in the maintenance process, which is cleaning the condenser coils.
Use a brush to remove debris
One of the most important steps in effectively cleaning the condenser coils of your refrigerator is to remove any dirt, dust, and debris that has accumulated on the surface. This can be easily achieved by using a brush designed for coil cleaning.
Before you begin, make sure your refrigerator is unplugged and the power is turned off. Locate the condenser coils, which are usually located at the back or bottom of the refrigerator. Gently brush off any loose dirt, dust, or debris using a soft-bristle brush. Be sure to brush in the direction of the coils to avoid pushing the dirt deeper into the fins.
If the buildup is more stubborn, you can also use a vacuum cleaner with a brush attachment to remove the debris. Simply run the brush attachment along the coils, using gentle, back-and-forth motions to dislodge and suction away the dirt.
Regular maintenance of your refrigerator’s condenser coils is essential for optimal performance and energy efficiency. By using a brush to remove debris, you can ensure that your coils stay clean and your refrigerator operates smoothly.
Spray the coils with a coil cleaner
As part of regular maintenance, it’s important to clean the condenser coils of your refrigerator to ensure its optimal performance. Over time, the coils can accumulate dirt, dust, and other debris, which can hinder the cooling efficiency of your fridge.
To effectively clean the coils, you’ll need a coil cleaner. These cleaners are specifically formulated to break down and remove the dirt and grime that build up on the coils. They come in spray bottles, making them easy and convenient to use.
Before spraying the coils, make sure to disconnect the power to the refrigerator to prevent any accidents. Then, carefully remove the grille or cover that protects the coils.
To apply the coil cleaner, simply spray it onto the coils, making sure to cover all areas. Use a back-and-forth motion to ensure even distribution. Pay special attention to any heavily soiled areas, as they may require extra attention.
Once the coils are thoroughly coated with the cleaner, let it sit for the recommended amount of time specified on the product label. This will allow the cleaner to penetrate and dissolve the dirt and grime.
After the designated time has passed, use a soft brush or a cloth to gently scrub the coils. This will help remove any stubborn debris that may still be clinging to the coils. Be careful not to apply too much pressure, as you don’t want to damage the delicate fins.
Once you’ve finished cleaning the coils, use a vacuum cleaner or a brush to remove the loosened dirt and dust. Make sure to be thorough, as any leftover debris can still hinder the cooling efficiency of your refrigerator.
Finally, reattach the grille or cover and reconnect the power to your refrigerator. Your condenser coils should now be clean and free of dirt and dust, allowing for optimal cooling performance.
Important Note: It’s recommended to clean the condenser coils at least once or twice a year to maintain the efficiency of your refrigerator and prolong its lifespan.
Let the cleaner sit for a few minutes
After applying the cleaner to the condenser coils of your refrigerator, it’s important to let it sit for a few minutes. This will allow the cleaner to penetrate and break down any built-up dirt, dust, and grime on the coils.
While the cleaner is doing its job, you can use a vacuum or a soft brush to remove any loose dirt and debris from the surrounding area. Be careful not to damage the coils or the fins as you clean.
During this waiting period, it’s also a good idea to check the rest of your refrigerator for any other signs of dirt or build-up. Take this time to wipe down the exterior surfaces, clean out the interior compartments, and ensure that all the vents are clear of any obstructions.
Once the cleaner has had a chance to work, it’s time to remove the dirt and residue. Using a soft brush or a vacuum, gently brush away any remaining dirt or debris from the coils. Be thorough yet gentle to avoid any damage.
After cleaning the coils, it’s important to perform regular maintenance to ensure their long-term efficiency. This includes checking and cleaning the coils on a regular basis, especially if you notice any signs of dirt or dust accumulation. By keeping the condenser coils clean, you can ensure that your refrigerator runs efficiently and effectively, saving you money on energy costs and extending the life of your appliance.
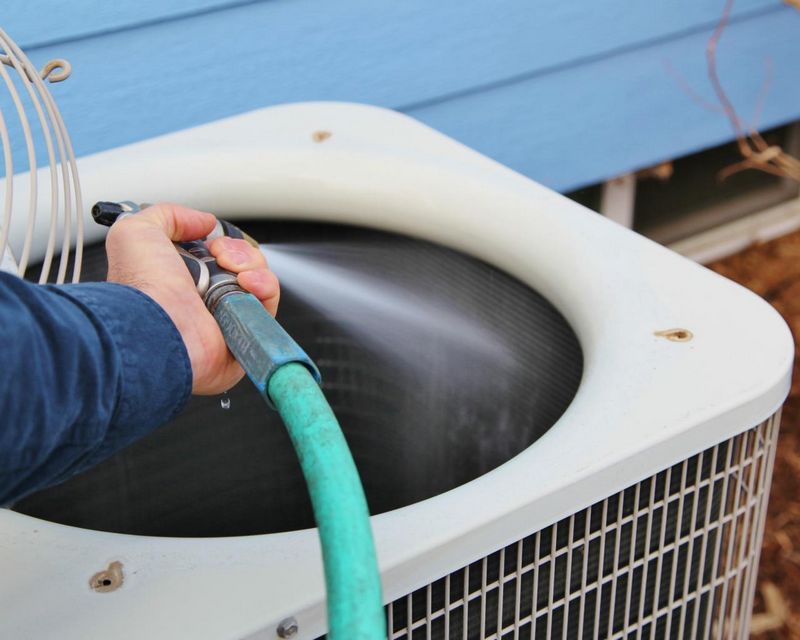
Rinse the coils with water
After completing the vacuuming process, it’s time to thoroughly clean the condenser coils of your refrigerator. Rinse the coils with water to remove any remaining dirt or dust that was not removed by the vacuum. This step is essential for ensuring the proper functioning and efficiency of your refrigerator.
To rinse the coils, you will need a spray bottle filled with clean water. Gently spray the water onto the coils, making sure to cover all areas. Use a soft brush or cloth to help remove any stubborn dirt or debris. Be careful not to apply too much pressure, as this can damage the delicate coils.
Make sure to direct the spray in the opposite direction of the airflow, to ensure that the dirt and dust are effectively removed from the coils. You may also want to place a towel or some absorbent material underneath the coils to catch the water and prevent it from dripping onto the floor.
Once you have thoroughly rinsed the coils, check for any remaining dirt or dust. If needed, repeat the rinsing process until the coils are completely clean. The clean coils will allow for proper ventilation and airflow, which is essential for the efficient cooling of your refrigerator.
| Step | Instructions |
| 1 | Fill a spray bottle with clean water |
| 2 | Gently spray the water onto the coils, covering all areas |
| 3 | Use a soft brush or cloth to remove stubborn dirt or debris |
| 4 | Direct the spray in the opposite direction of the airflow |
| 5 | Check for any remaining dirt or dust and repeat if necessary |
By following these steps, you can effectively clean the condenser coils of your refrigerator and ensure its proper maintenance. Regular cleaning of the coils will prevent the buildup of dirt and dust, and help prolong the lifespan of your refrigerator.
Check for any stubborn dirt or debris
Regularly checking for stubborn dirt or debris on your refrigerator’s condenser coils is an essential part of maintenance and cleaning. Over time, these coils can accumulate dust, dirt, and other particles, which can reduce the efficiency of your refrigerator and lead to potential problems.
To check for any stubborn dirt or debris, you will need a brush and a vacuum cleaner.
Step 1: Unplug your refrigerator from the power source to ensure your safety.
Step 2: Locate the condenser coils, usually located at the back or underneath your refrigerator. You may need to remove a panel or grille to access them.
Step 3: Inspect the condenser coils closely for any visible dirt or debris. Look for signs of dust, pet hair, or other particles that may have accumulated.
Step 4: Use a brush with soft bristles to gently loosen and remove any stubborn dirt or debris. Be careful not to apply too much pressure or damage the delicate coils.
Step 5: Once the loose dirt or debris has been removed, use a vacuum cleaner with a brush attachment to vacuum up any remaining dust or particles. Pay attention to the areas around the coils and vents, as these areas are usually prone to accumulation.
Step 6: After cleaning, replace any removed panels or grilles and plug your refrigerator back into the power source.
Note: It is recommended to clean the condenser coils at least once or twice a year to maintain the efficiency of your refrigerator and prevent potential issues.
By regularly checking for stubborn dirt or debris on your refrigerator’s condenser coils and cleaning them effectively, you can ensure optimal performance and prolong the lifespan of your appliance.
Use a fin comb to straighten bent fins
Over time, the fins of your refrigerator’s condenser coils can become bent or damaged. This can affect the efficiency of your refrigerator and reduce its cooling performance. To ensure proper airflow and efficiency, it’s important to straighten any bent or damaged fins using a fin comb.
A fin comb is a specialized tool with small teeth that allows you to straighten the fins of your condenser coils with ease. Here’s how to use it:
- Switch off and unplug your refrigerator to ensure your safety during the maintenance process.
- Locate the condenser coils, which are usually located on the back or bottom of the refrigerator.
- Inspect the coils for any bent or damaged fins. These fins are delicate and can be easily damaged, so be careful.
- Insert the fin comb into the space between the fins and gently push it through, moving it back and forth to straighten any bent fins.
- Continue this process until you have straightened all the bent fins.
- Once you’re done, use a vacuum cleaner or a brush to remove any loose dust or dirt from the coils.
Straightening the bent fins of your condenser coils is an important step in maintaining the efficiency and performance of your refrigerator. By using a fin comb, you can easily restore your coils to their optimal condition and ensure a longer lifespan for your appliance.
Check the condenser fan for any obstructions
One important step in cleaning and maintaining your refrigerator’s condenser coils is checking the condenser fan for any obstructions. The condenser fan is responsible for circulating air over the coils to help remove heat from the refrigerant. If the fan is obstructed by dust or debris, it can’t function properly, which can lead to reduced cooling performance and increased energy consumption.
To check the condenser fan, first, unplug your refrigerator or turn off the power to ensure your safety. Then, locate the fan, which is usually located near the condenser coils at the back or bottom of the refrigerator. Use a flashlight if needed.
Inspect the fan blades for any visible dust or dirt accumulation. If you see any buildup, your fan is likely obstructed. You can use a brush or a vacuum with a narrow attachment to gently clean the blades. Be careful not to bend or damage the blades while cleaning.
In addition to the fan blades, also check the area around the fan for any loose items or debris. Clear out any objects that might be obstructing the fan’s movement.
Note: It’s important to avoid touching the condenser coils directly while checking the fan. The coils can be sharp and delicate, and touching them could cause damage.
By regularly checking and cleaning the condenser fan for any obstructions, you can ensure proper airflow and optimal performance of your refrigerator’s condenser coils, leading to better cooling efficiency and longer lifespan of the appliance.
Reinstall the outer panel
After thoroughly cleaning the condenser coils, it is now time to reinstall the outer panel on your refrigerator. Make sure to follow these steps:
- Locate the outer panel that you removed earlier during the cleaning process.
- Gently position the panel back onto the refrigerator and align it with the mounting holes.
- Secure the panel using the screws or clips provided, ensuring that it is firmly in place.
- Double-check that the panel is properly aligned and securely fastened before moving on to the next step.
Reinstalling the outer panel is an important part of the condenser coil cleaning process. It helps to protect the coils from dirt and maintain the overall efficiency of your refrigerator. By taking the time to reinstall the panel correctly, you can prolong the lifespan of your appliance and reduce the need for frequent maintenance.
Turn on the power
Before starting the cleaning process, make sure to turn off the power to the refrigerator to avoid any potential hazards. Locate the power switch or unplug the refrigerator from the wall outlet.
Once the power is safely turned off, you can proceed with the condenser coil cleaning maintenance. Condenser coils are responsible for releasing heat as the refrigerant passes through them. Over time, these coils can collect dust and dirt, which can hinder their effectiveness.
First, grab a vacuum cleaner with a brush attachment to remove loose dust and debris from the coils. Use the brush to gently loosen the dirt from the coils and then use the vacuum to suck it away. Take care not to damage or bend the delicate fins of the coils in the process.
After vacuuming, you can further clean the coils by using a coil cleaning solution or a mixture of mild detergent and warm water. Apply this solution to a soft bristle brush or a coil cleaning brush and carefully scrub the coils in a back-and-forth motion. This will help remove any remaining dirt or grime that the vacuum might have missed.
Once you have scrubbed the coils, rinse them thoroughly with clean water. Make sure there are no soap residue or cleaning solution left on the coils. Allow the coils to air dry completely before turning the power back on.
Once the coils are dry, you can plug the refrigerator back into the wall outlet or turn on the power switch. It’s important to clean the condenser coils at least once every six months to maintain the efficiency of your refrigerator and ensure it operates at optimal performance.
By regularly cleaning the condenser coils, you can prevent dust and dirt build-up, which can lead to poor cooling performance and higher energy consumption. So, take the time to clean your condenser coils and keep your refrigerator running smoothly.
Monitor the system for optimal performance
Regular monitoring of the condenser coils is an essential part of maintenance for your refrigerator.
Step 1: Make sure to inspect the condenser coils regularly. The coils are located either at the back or the bottom of the refrigerator. Keep an eye out for any dirt or dust buildup on the coils.
Step 2: Use a brush or a vacuum cleaner with a brush attachment to gently clean the coils. Be careful not to damage the coils while cleaning.
Step 3: If you notice a significant amount of dirt or dust on the condenser coils, it is recommended to unplug the refrigerator and remove any debris using a soft brush or vacuum cleaner.
Step 4: After cleaning the coils, plug the refrigerator back in and wait for it to cool down. Monitor its performance to ensure optimal cooling and efficiency.
By regularly monitoring and cleaning the condenser coils, you can help extend the lifespan of your refrigerator and maintain its optimal performance.
Schedule regular maintenance
Regular maintenance is crucial to keep your condenser coils clean and your refrigerator running efficiently. Set a schedule to clean the condenser coils at least twice a year to prevent dust and dirt buildup. You can mark it on your calendar or set a reminder on your phone to ensure you don’t forget.
During maintenance, make sure to switch off the refrigerator before cleaning the condenser coils. This will prevent any electrical hazards and ensure your safety. You can use a vacuum cleaner or a soft brush to remove the accumulated dust and dirt from the coils. Be gentle to avoid damaging the coils or any other components.
If the condenser coils are heavily soiled, you can also use a coil cleaning solution specifically designed for refrigerator coils. Follow the instructions on the cleaner and use it with caution, as some cleaners may require rinsing with water after application.
In addition to cleaning the condenser coils, it’s also important to check for any signs of wear or damage during maintenance. Inspect the coils for any bends, dents, or leaks. If you notice any issues, it’s best to contact a professional technician to assess and repair the condenser coils.
Regular maintenance of the condenser coils will not only improve the refrigerator’s performance but also extend its lifespan. By removing the dust and dirt, you allow the coils to dissipate heat efficiently, preventing the compressor from working harder than necessary. This can result in energy savings and lower electricity bills.
Don’t overlook the importance of scheduling regular maintenance for your condenser coils. It’s a simple yet effective way to ensure your refrigerator functions optimally and lasts for years to come.
Consult a professional if needed
If you find that your condenser coils are heavily coated with dirt, dust, or debris, or if you are unsure about the cleaning process, it is always a good idea to consult a professional. They have the expertise and knowledge to safely and effectively clean your condenser coils without causing any damage to your refrigerator.
A professional can use specialized cleaning tools and techniques to remove stubborn dirt and debris buildup on the coils. They may use a brush or a coil cleaning tool specifically designed for condenser coils. These tools can effectively reach and remove dirt from the tight spaces between the coils, ensuring optimal performance and efficiency of your refrigerator.
Professional maintenance and cleaning services can also provide additional benefits. They can inspect other components of your refrigerator to ensure they are functioning properly. They can also identify any potential issues or signs of wear and tear that may require attention. By consulting a professional, you can have peace of mind knowing that your condenser coils and refrigerator are receiving the proper care and maintenance they need.
Overall, while cleaning your condenser coils can be a DIY task, it is important to understand the limits of your abilities. If you are unsure or uncomfortable with the cleaning process, it is always best to consult a professional. They can provide you with the necessary expertise and ensure that your condenser coils are cleaned effectively and safely.
Enjoy the benefits of a clean condenser coil
Maintaining your refrigerator is essential for efficient cooling and energy savings. One important aspect of refrigerator maintenance is cleaning the condenser coils regularly. By keeping these coils free of dust and debris, you can enjoy several benefits for both your appliance and your home.
When the condenser coils are clean, your refrigerator can operate at its optimum efficiency. Dust and dirt that accumulate on the coils can hinder the heat transfer process, causing your fridge to work harder and use more energy to cool your food. By regularly cleaning the coils, you can help reduce energy consumption and save on your electricity bill.
In addition to energy savings, a clean condenser coil can also extend the lifespan of your refrigerator. When the coils are clogged with dust, the compressor has to work harder to maintain the desired temperature inside the appliance. This increased workload can lead to premature wear and tear on the compressor, reducing its lifespan. By cleaning the coils regularly, you can help prolong the life of your refrigerator and avoid costly repairs.
Cleaning the condenser coils is a simple task that can be done with a few basic tools. Start by unplugging your refrigerator and locating the coils, usually found at the back or underneath the appliance. Use a coil brush or a soft-bristle brush to gently remove any dust or debris from the coils. You can also use a vacuum cleaner with a brush attachment to remove any loose particles.
Once you have brushed off the dust, use a damp cloth to wipe down the coils to remove any remaining dirt. Be sure to clean the surrounding area as well, as dust and debris can accumulate in the vicinity of the coils.
By regularly cleaning your condenser coils, you can enjoy a more efficient and reliable refrigerator. Not only will your appliance use less energy and save you money, but it will also last longer, reducing the need for frequent replacements. Make cleaning your condenser coils a part of your regular maintenance routine, and you’ll reap the benefits for years to come.
Q&A:
Why is it important to clean condenser coils?
It is important to clean condenser coils because they are responsible for transferring heat from the refrigerant to the outdoor air. Over time, dirt, dust, and debris can accumulate on the coils, reducing their efficiency and causing the HVAC system to work harder and use more energy. Cleaning the condenser coils helps to maintain the efficiency of the system and prevent costly repairs.
How often should condenser coils be cleaned?
The frequency of cleaning condenser coils depends on several factors, such as the environment and usage of the HVAC system. In general, it is recommended to clean the coils at least once a year. However, if the system is located in a dusty or high-traffic area, more frequent cleaning may be necessary.
What tools and materials are needed to clean condenser coils?
To clean condenser coils effectively, you will need a coil cleaning solution, a stiff-bristle brush or coil fin comb, a hose or pressure washer, gloves, safety goggles, and a vacuum cleaner. These tools and materials will help you remove dirt, debris, and grime from the coils and restore their efficiency.
Can I clean condenser coils myself, or do I need to hire a professional?
You can clean condenser coils yourself if you have the necessary tools and are comfortable working with HVAC systems. However, if you are unsure or inexperienced, it is recommended to hire a professional. They have the expertise and equipment to clean the coils effectively and safely, ensuring the longevity and performance of your HVAC system.
What are the potential risks or problems if condenser coils are not cleaned regularly?
If condenser coils are not cleaned regularly, they can become clogged with dirt and debris, reducing the airflow and heat transfer. This can lead to several problems, including reduced cooling capacity, increased energy consumption, system breakdowns, and compressor failure. By neglecting regular coil cleaning, you risk compromising the performance and lifespan of your HVAC system.
Why is it important to clean condenser coils?
It is important to clean condenser coils because they play a critical role in the cooling process of your HVAC system. Over time, these coils can become clogged with dirt, dust, and debris, which can reduce their efficiency and cause your system to work harder and consume more energy. Regular cleaning of the condenser coils helps to improve the performance and lifespan of your HVAC system.